Create Azure app for AD-Integration
Introduction
This guide provides a step-by-step walkthrough for setting up an Azure App for Active Directory (AD) integration between Office 365 and NordicScreen Q-Cal. The guide is divided into two steps:
1. Setting up the Azure App in the Azure Portal
2. Configuring the integration in Q-Cal
Each section includes detailed steps to ensure a smooth setup process. If you need additional assistance, a Frequently Asked Questions (FAQ) section is available at the end of the guide.
Step 1: Setting Up Azure App in Azure Portal
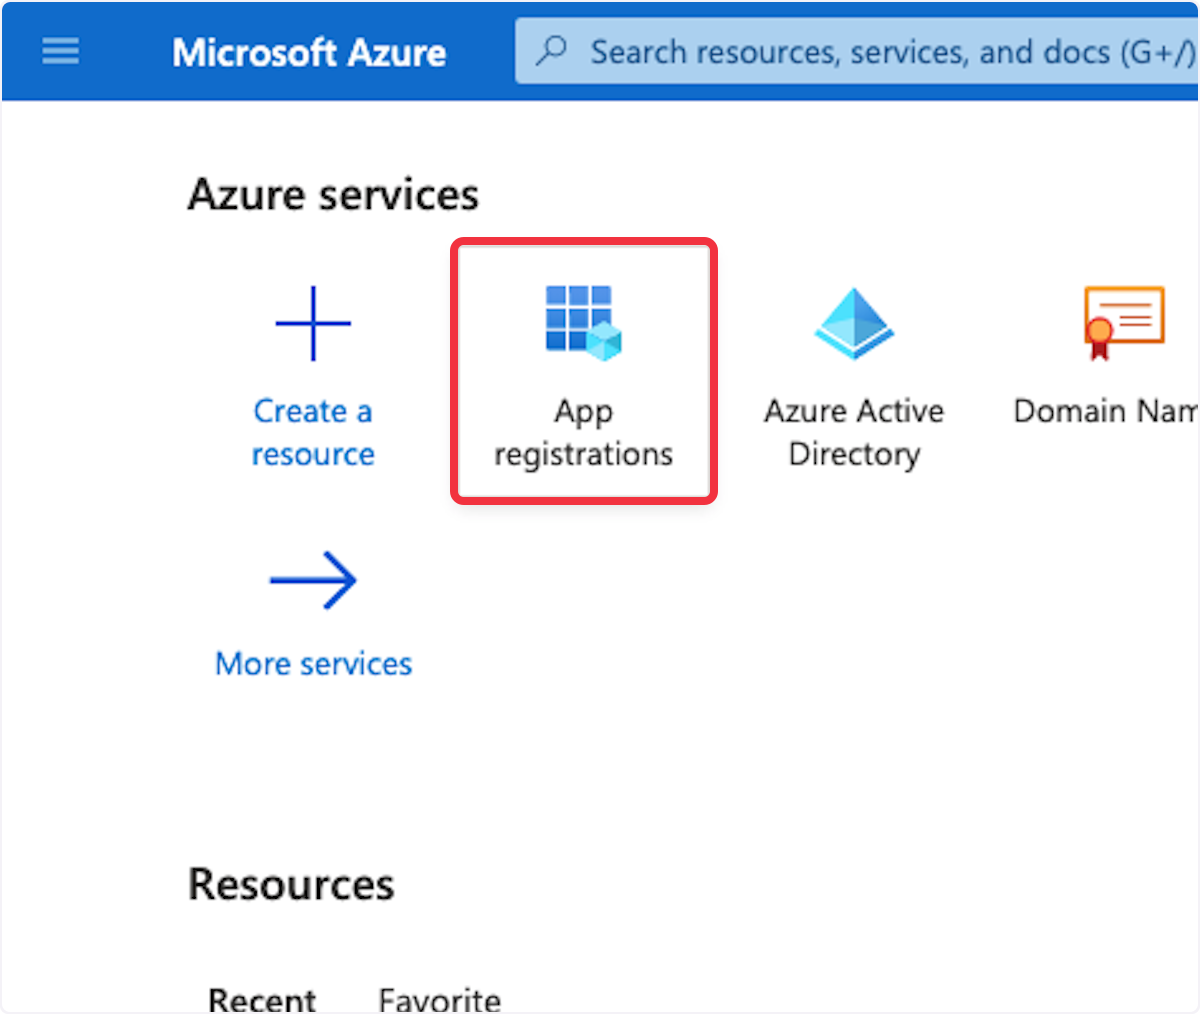
1. Create App registration in Azure.
2. Click on App registrations
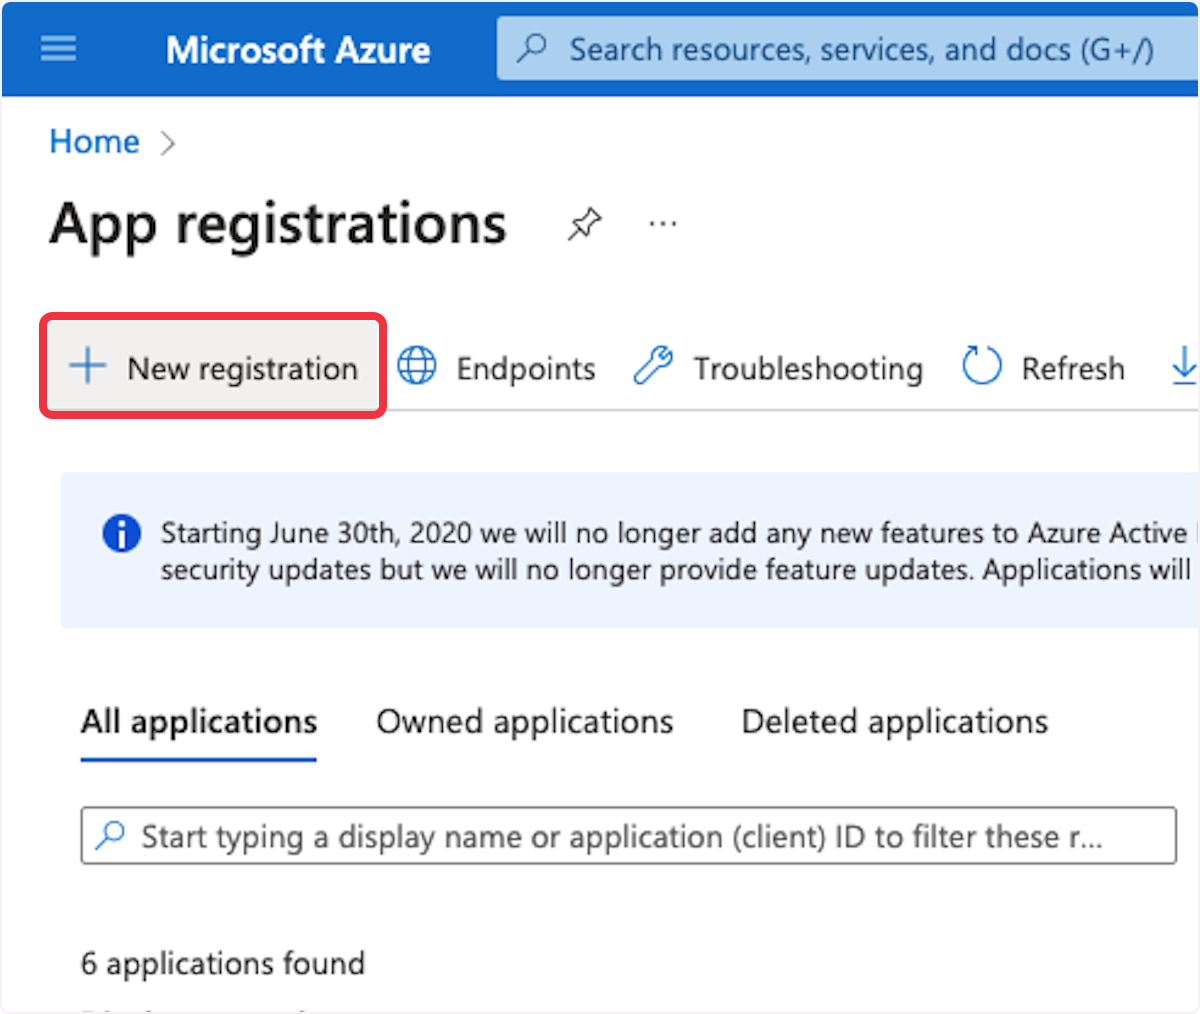
3. Click on New registration
4. Type "NordicScreen - Q-Cal AD"
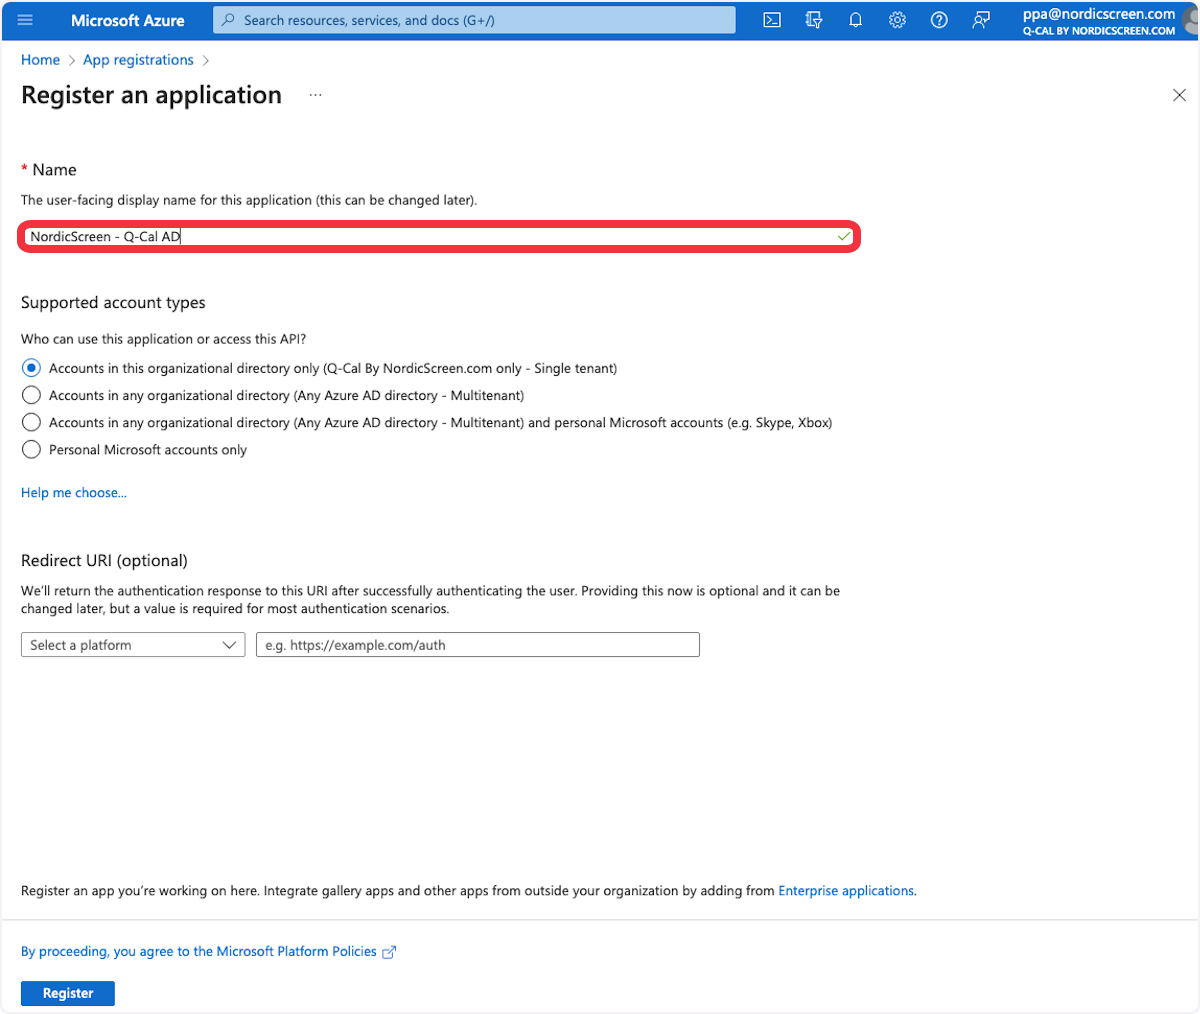
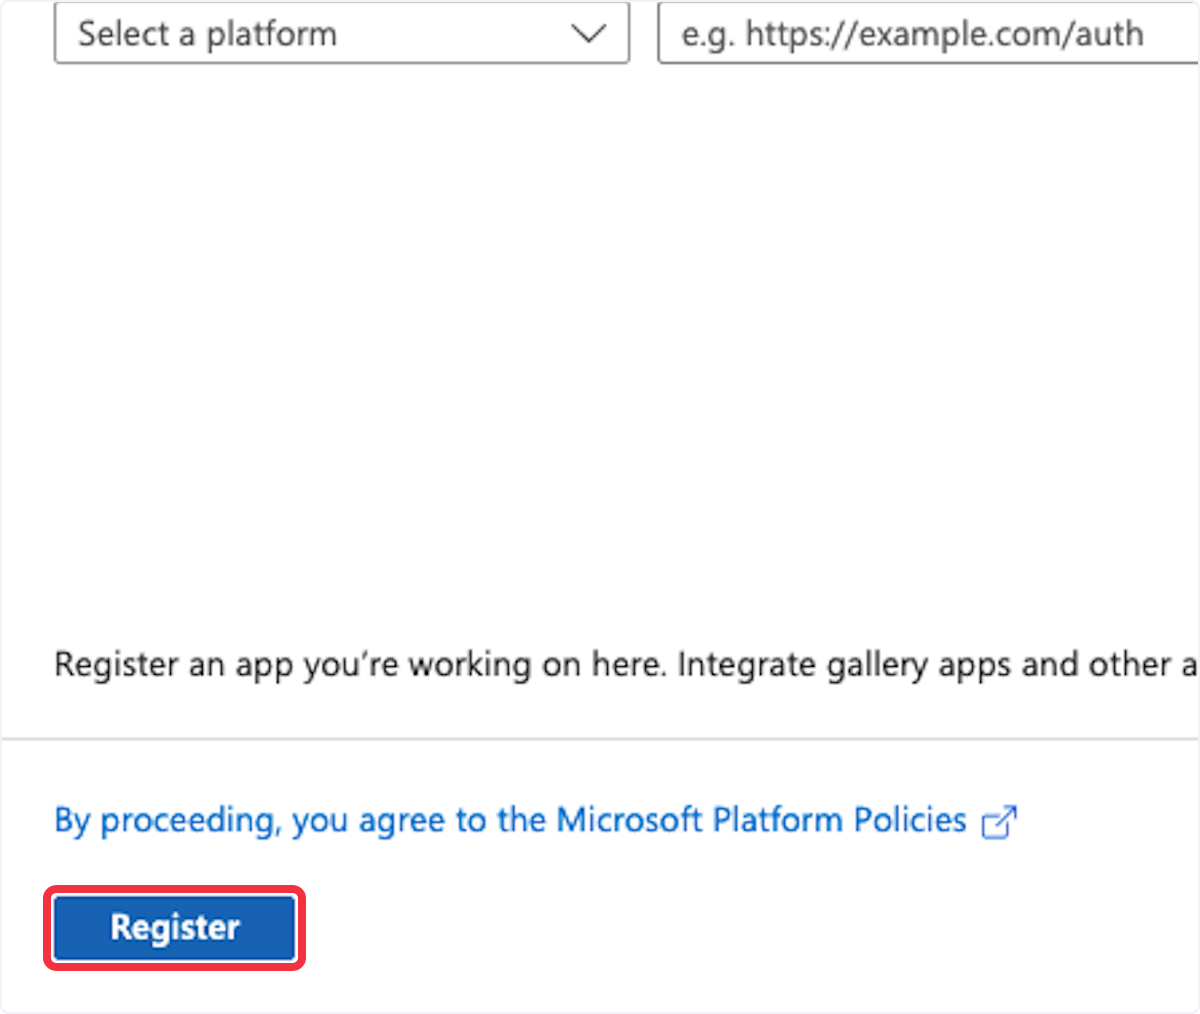
5. Click on Register
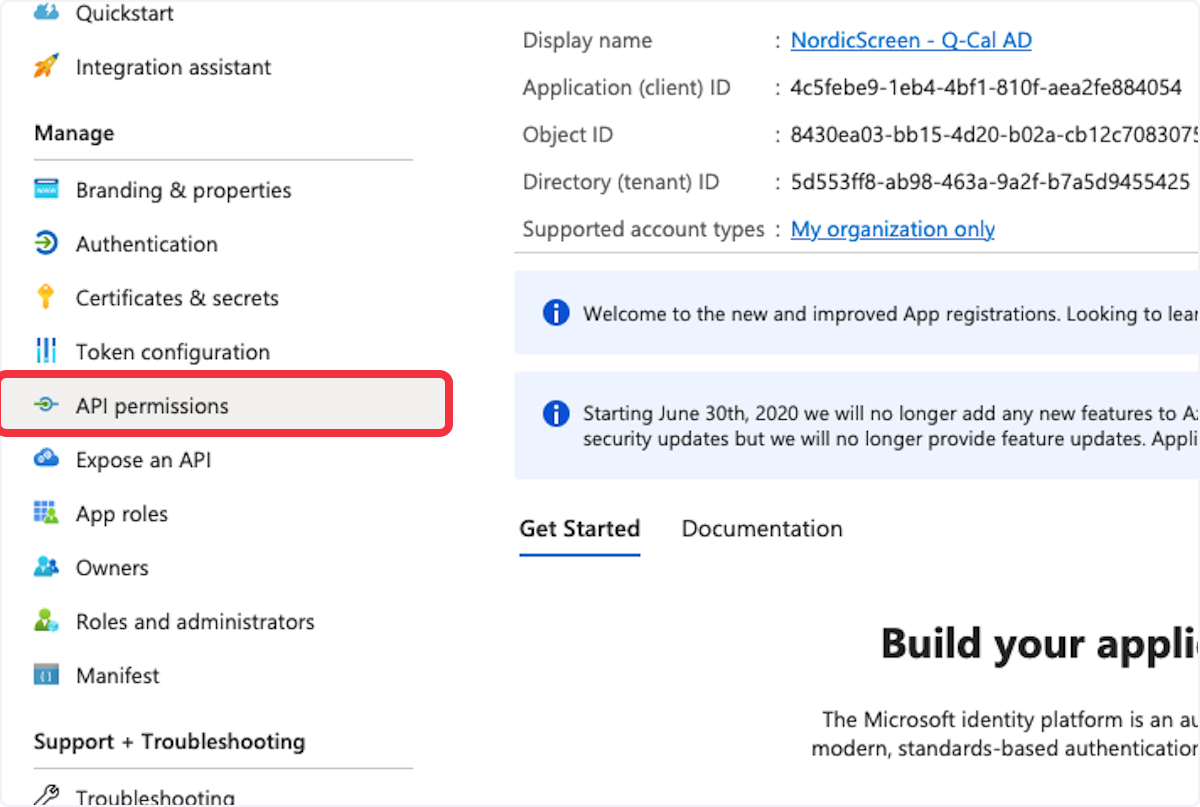
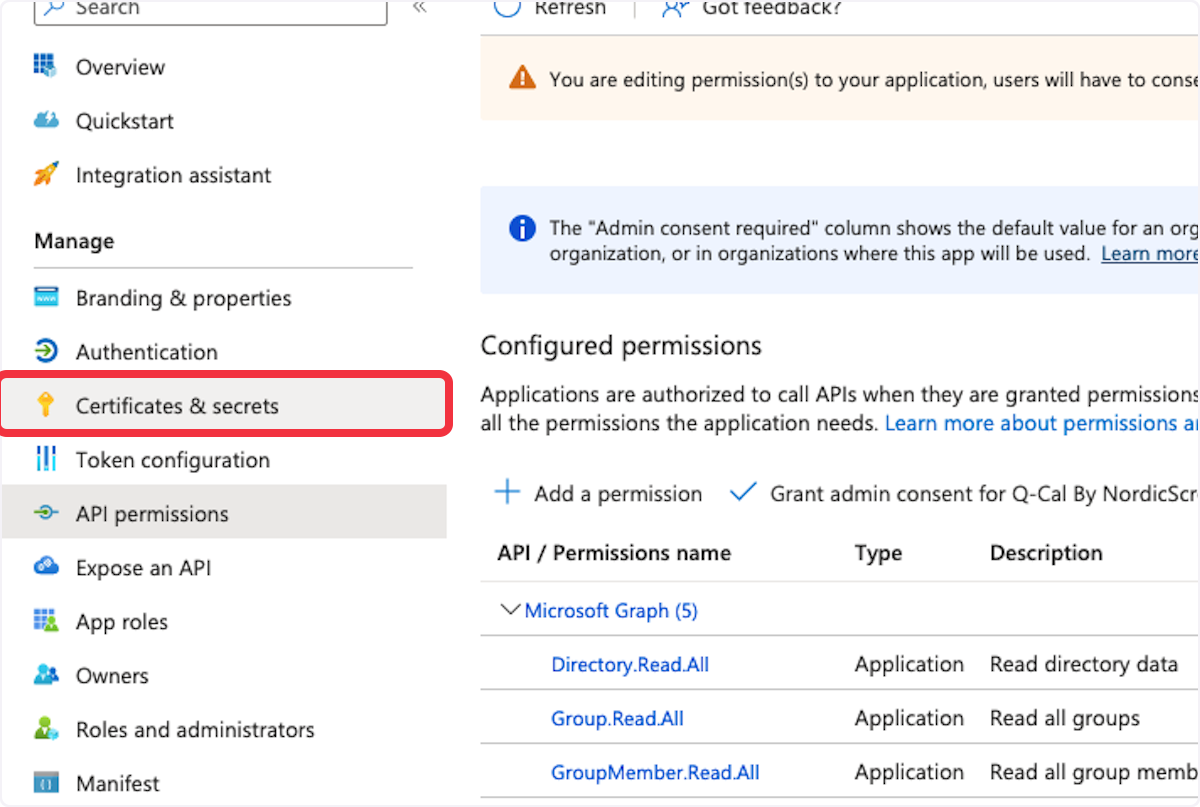
6. Click on API permissions
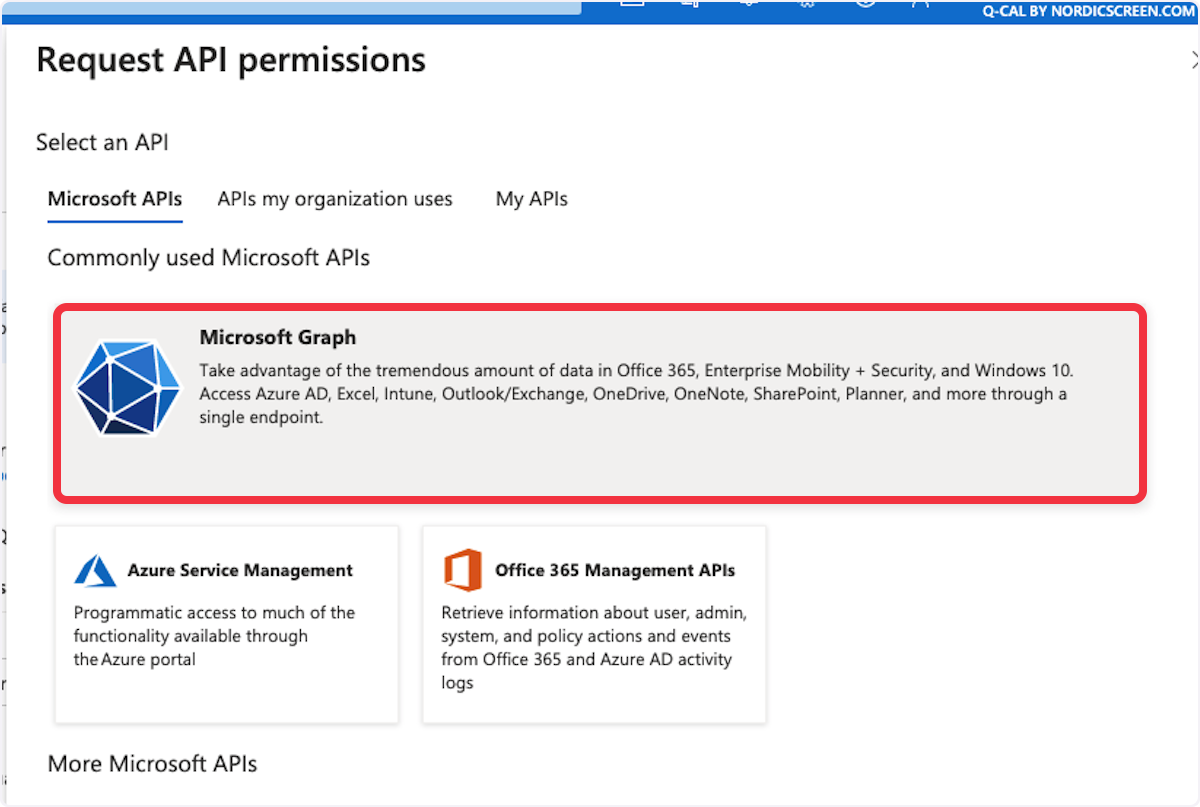
7. Click on Add a permission

8. Click on Microsoft Graph
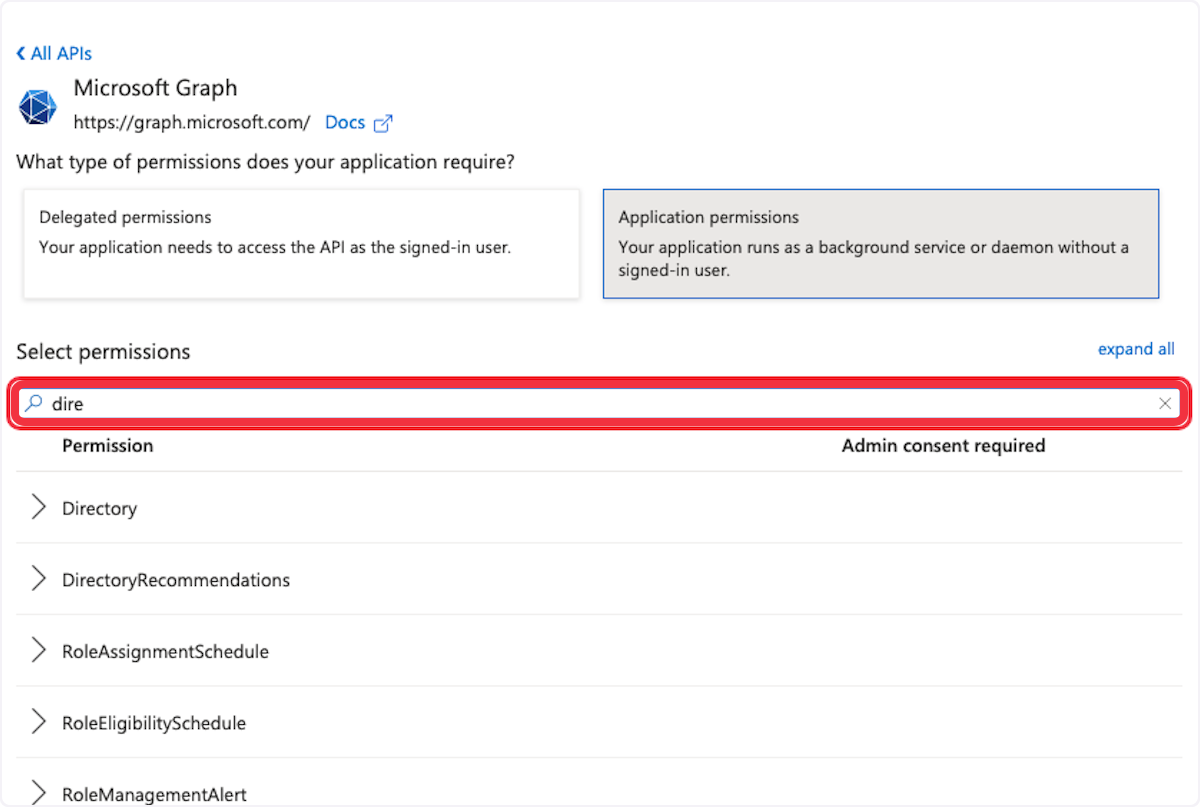
9. Click on Your application runs as a background service or daemon without a signed-in user.

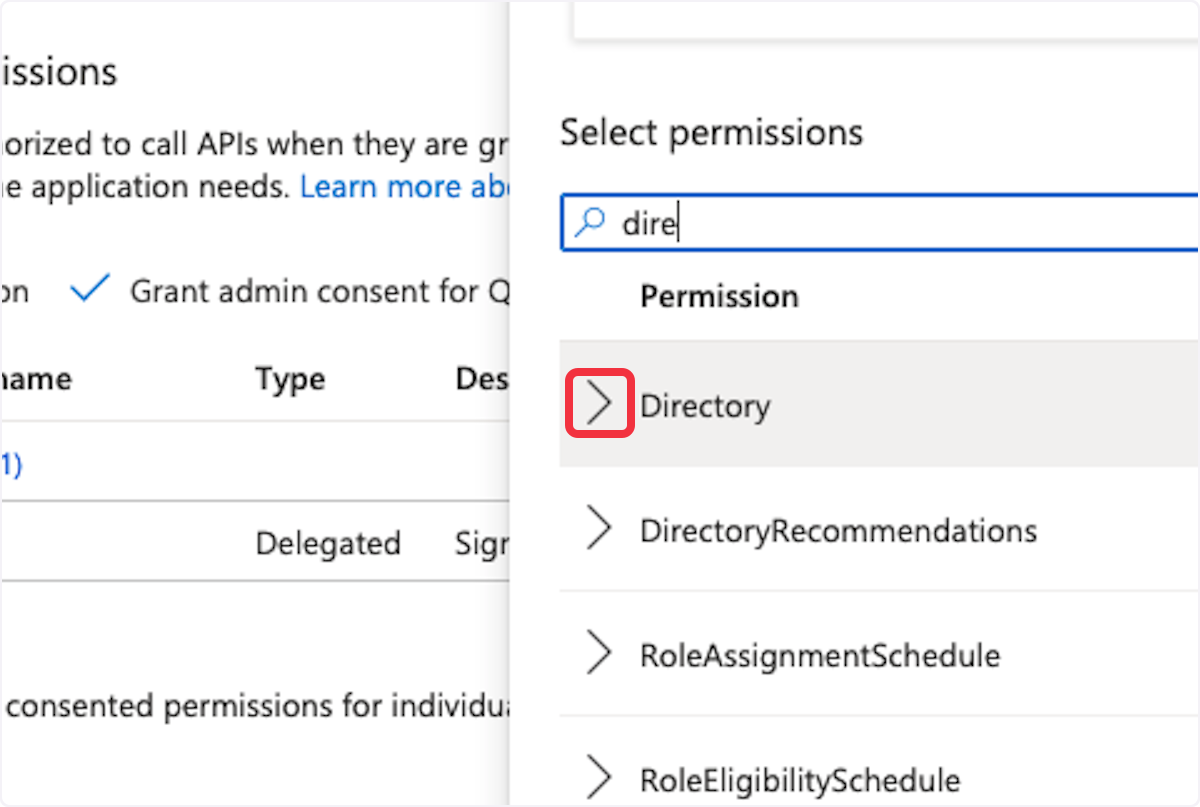
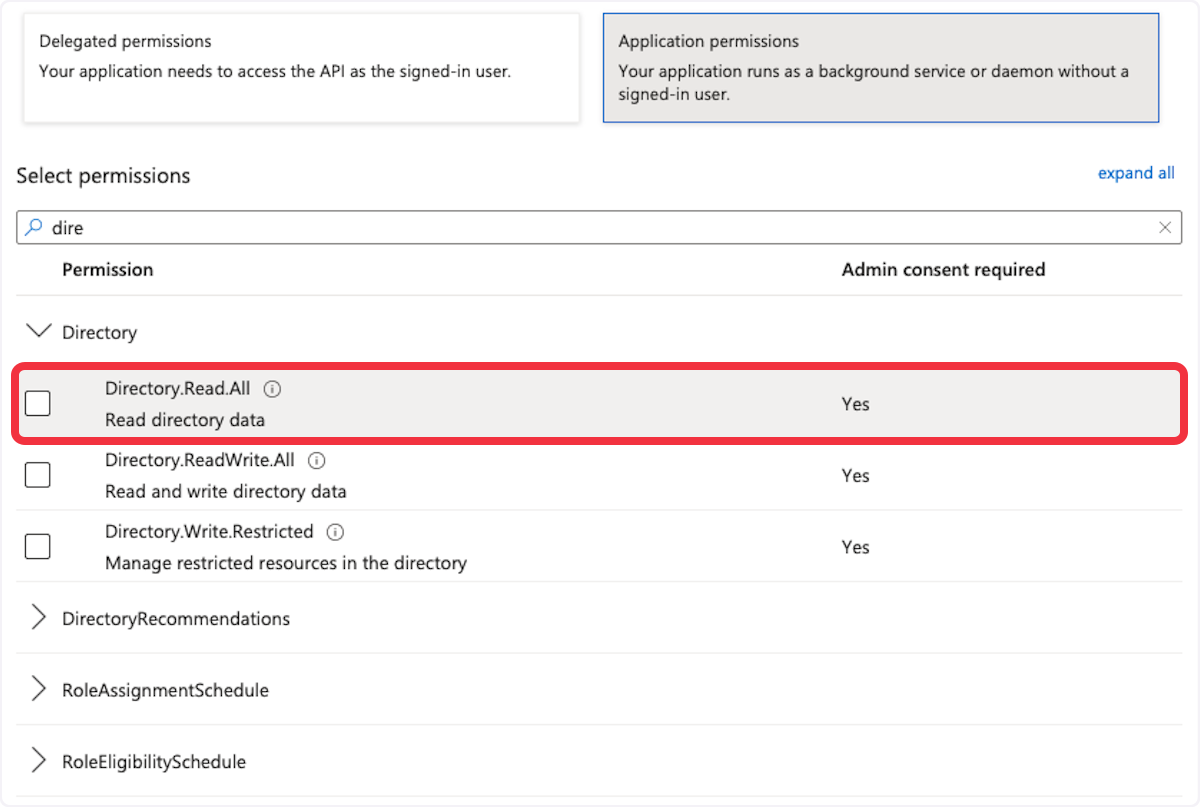
10. Type "directory"
11. Click on Expand
12. Click on Directory.Read.All
13. Type "group"
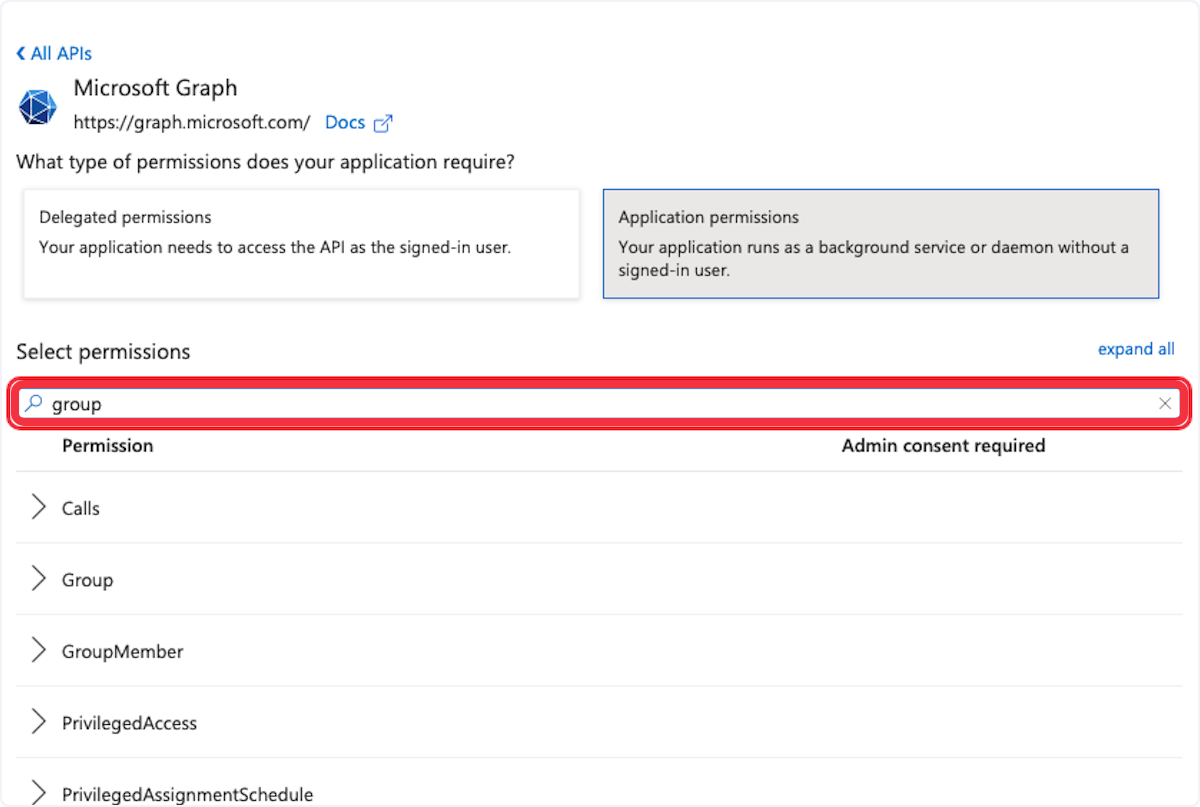
14. Click on Expand

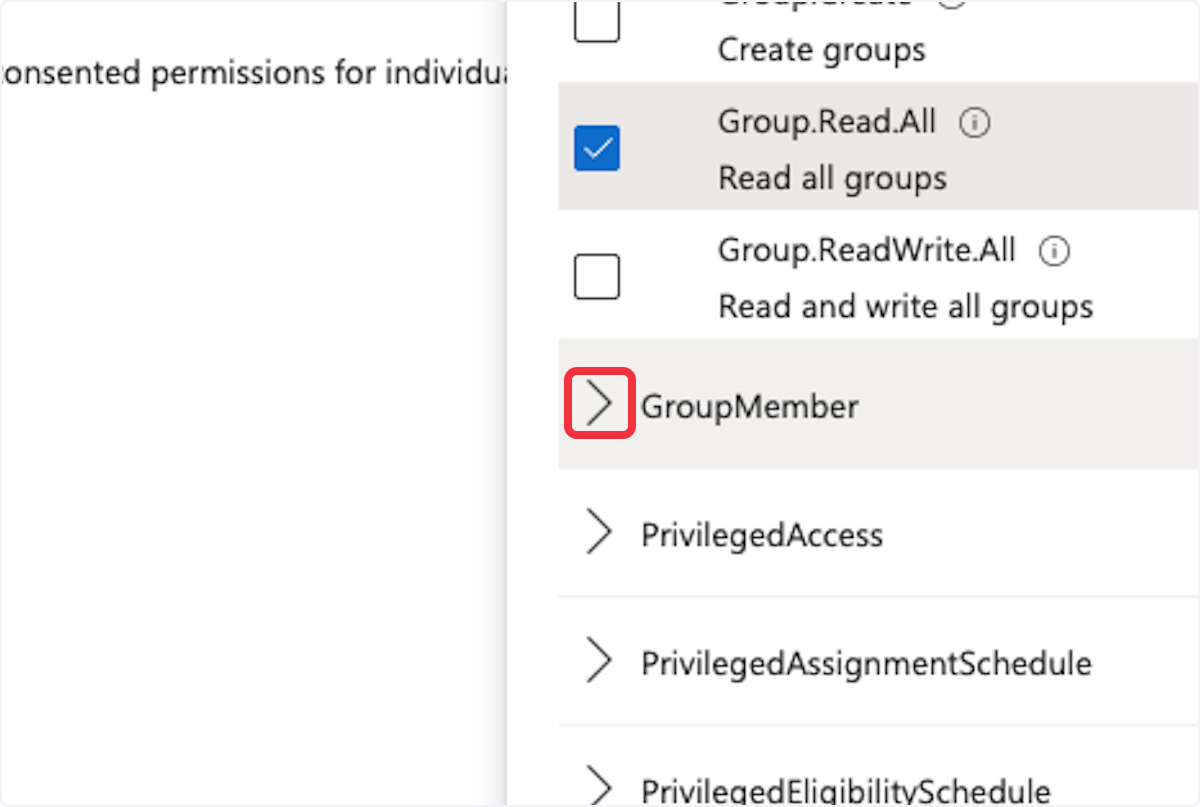
15. Click on Group.Read.All

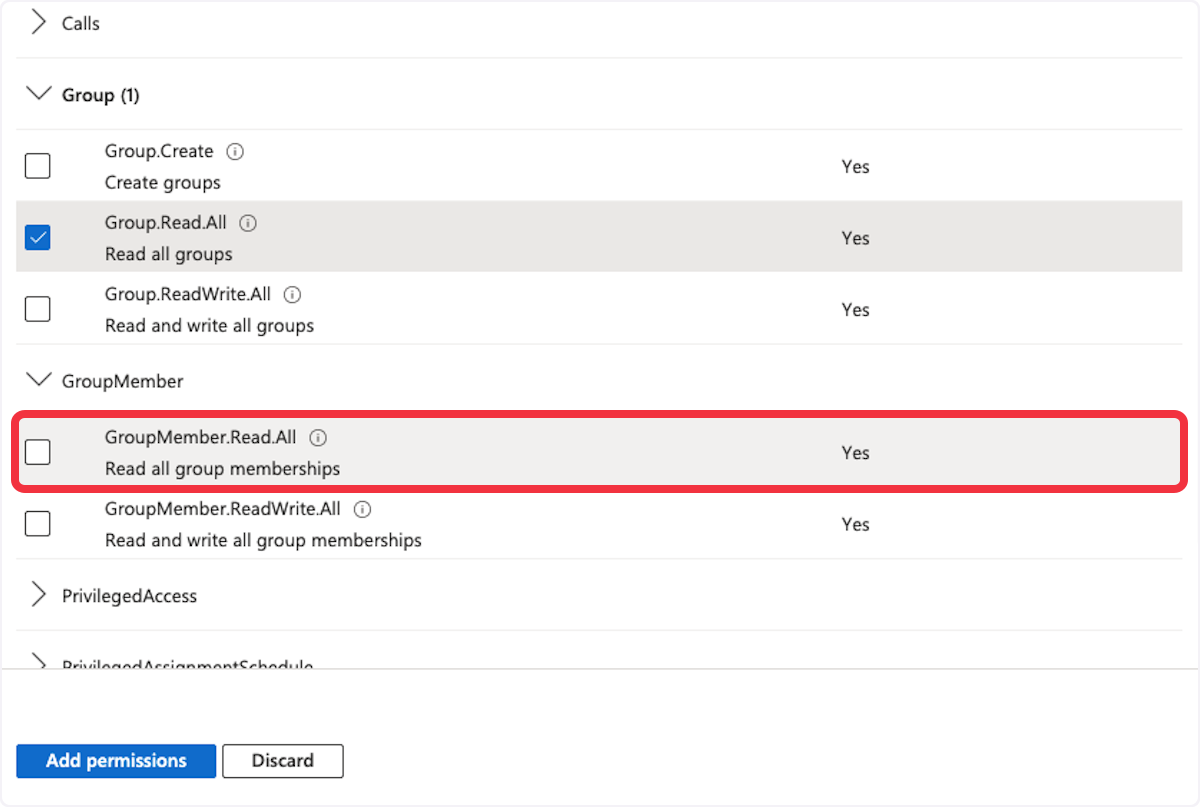
16. Type Group Member

17. Click on Expand
18. Click on GroupMember.Read.All
19. Type "user"
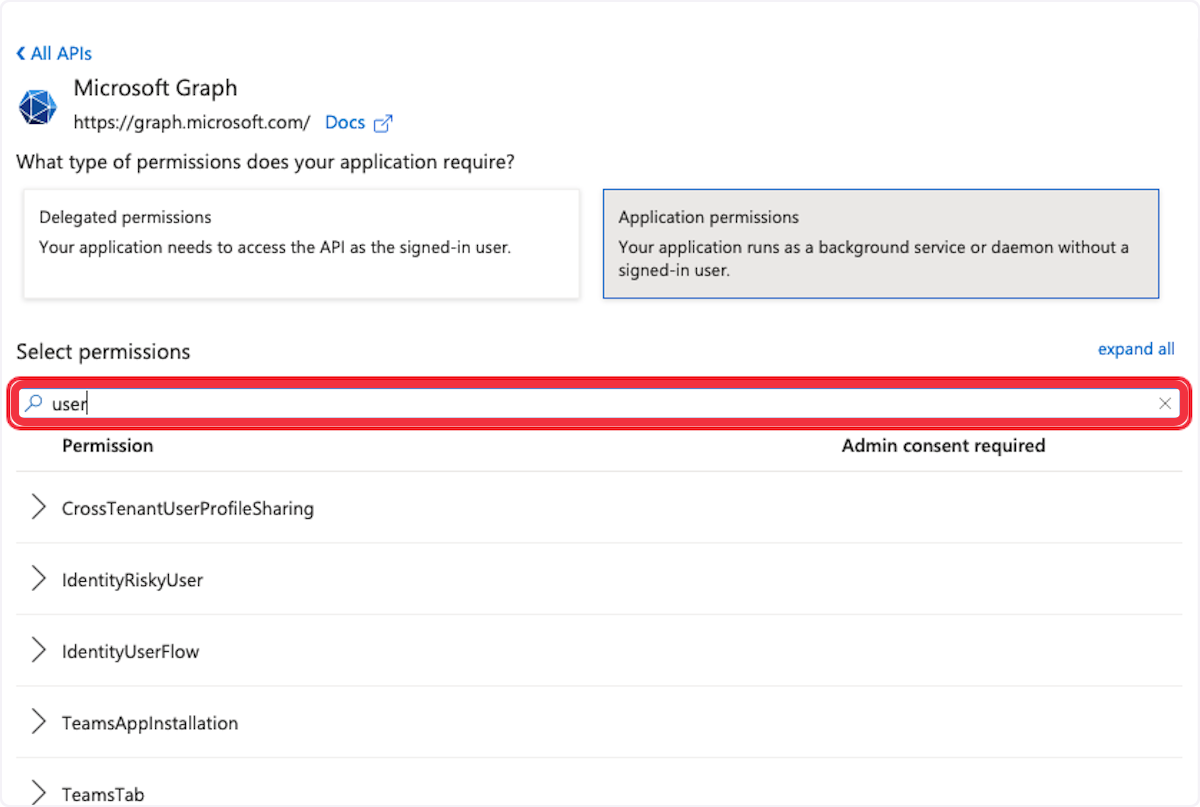
20. Click on Expand
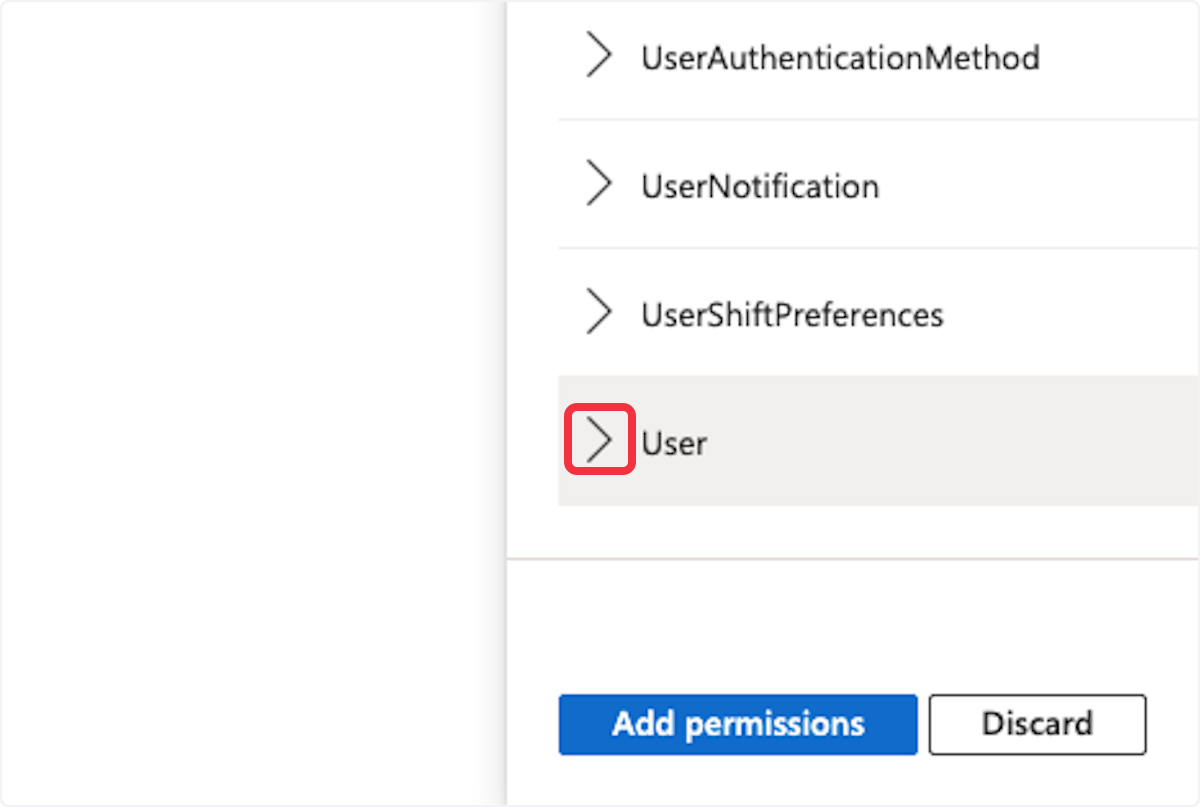
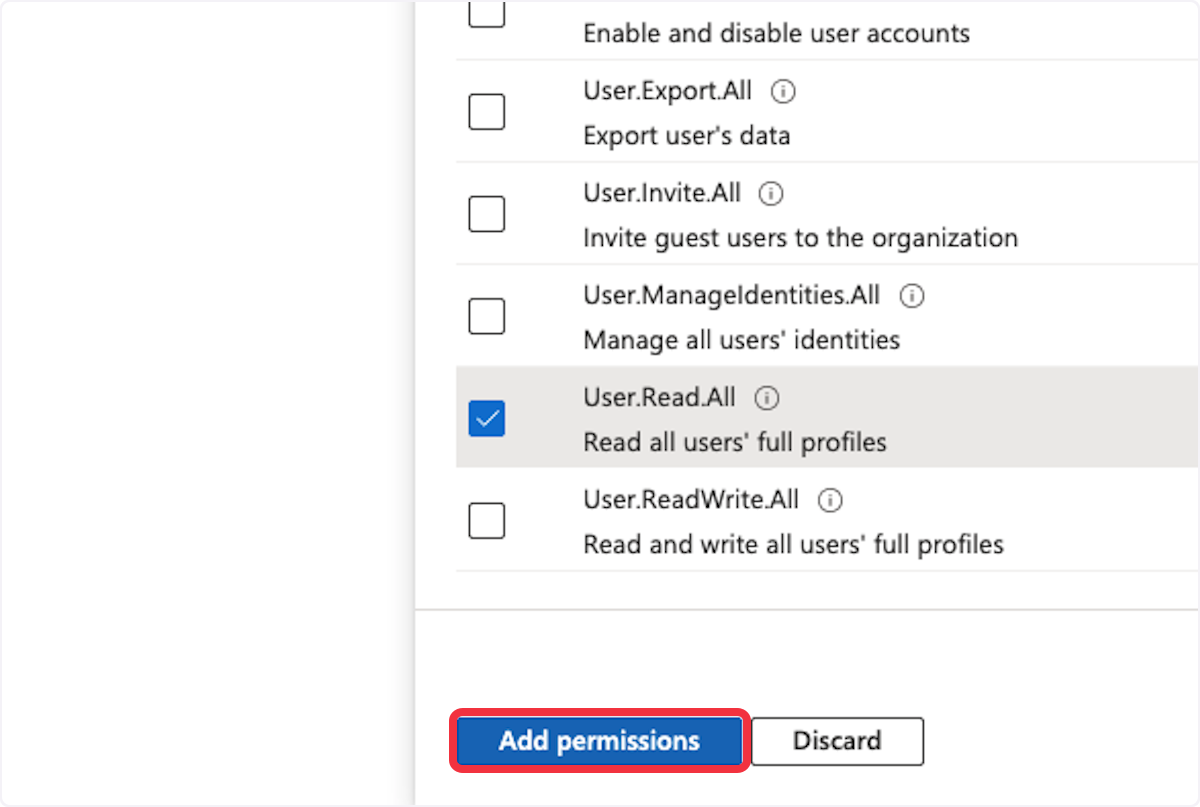
21. Click on User.Read.All
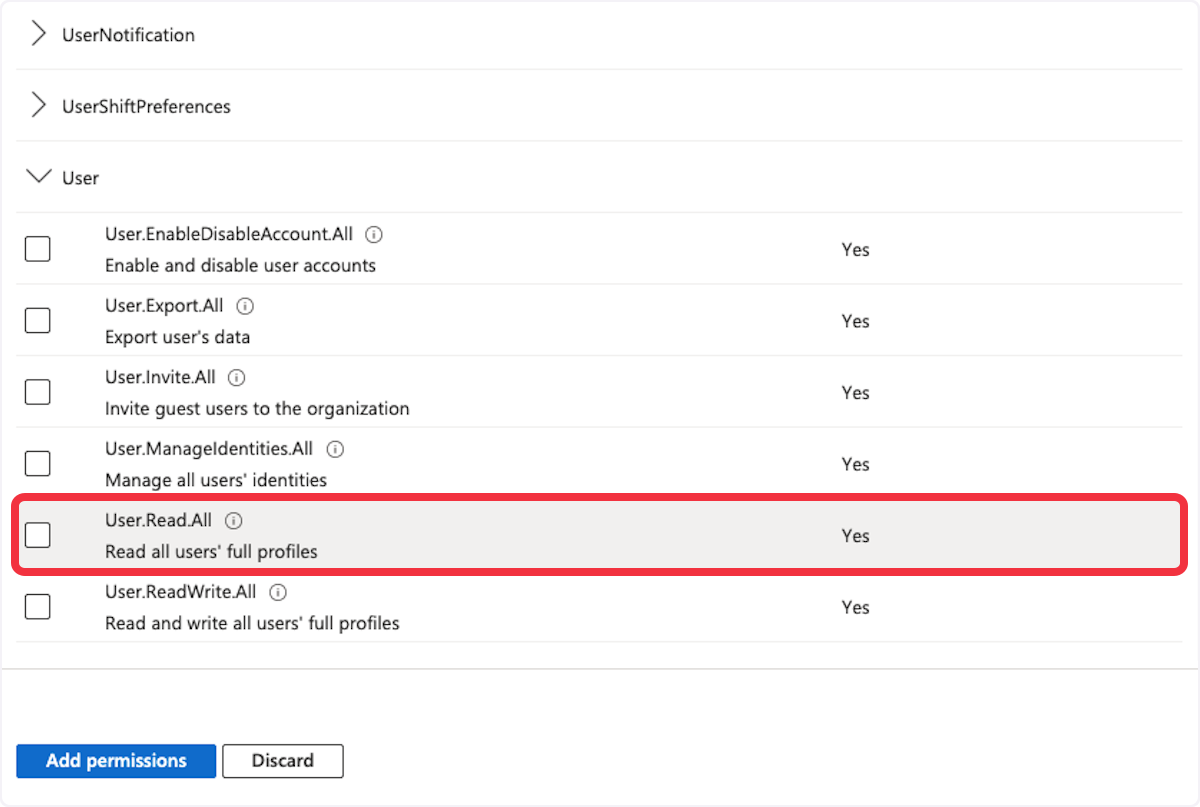
22. Click on Add permissions
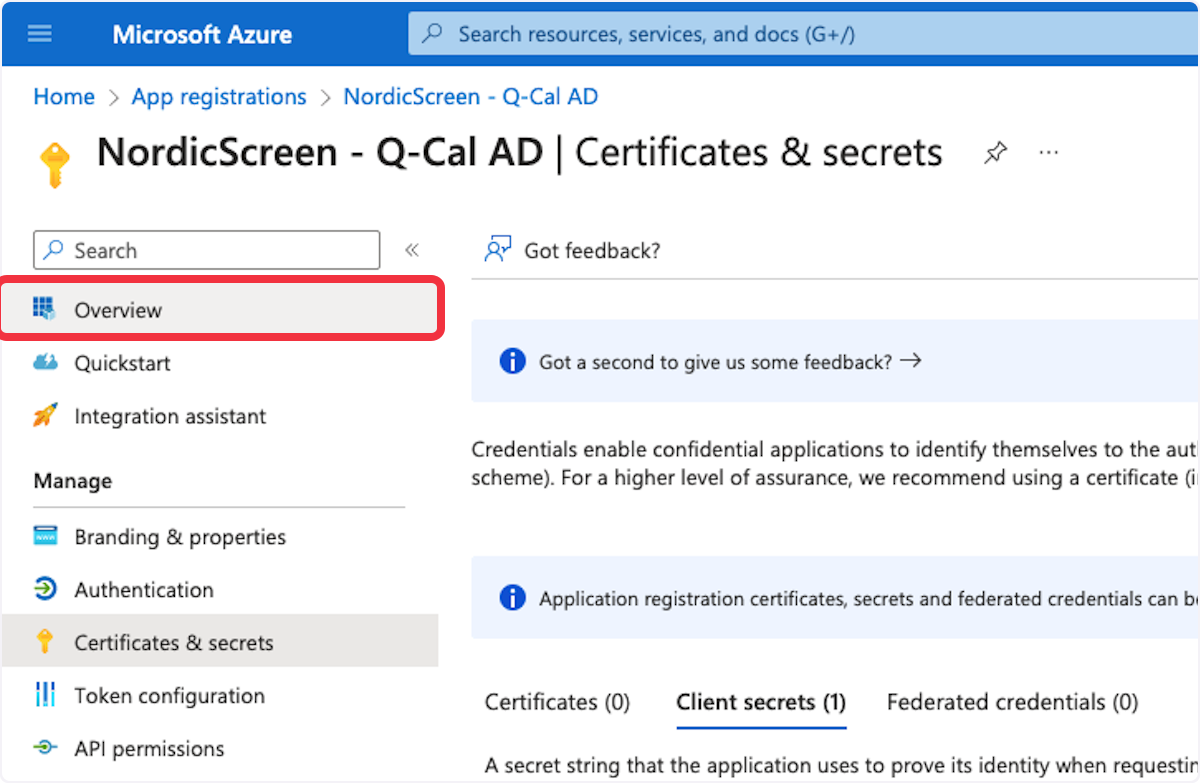
23. Click on Certificates & secrets
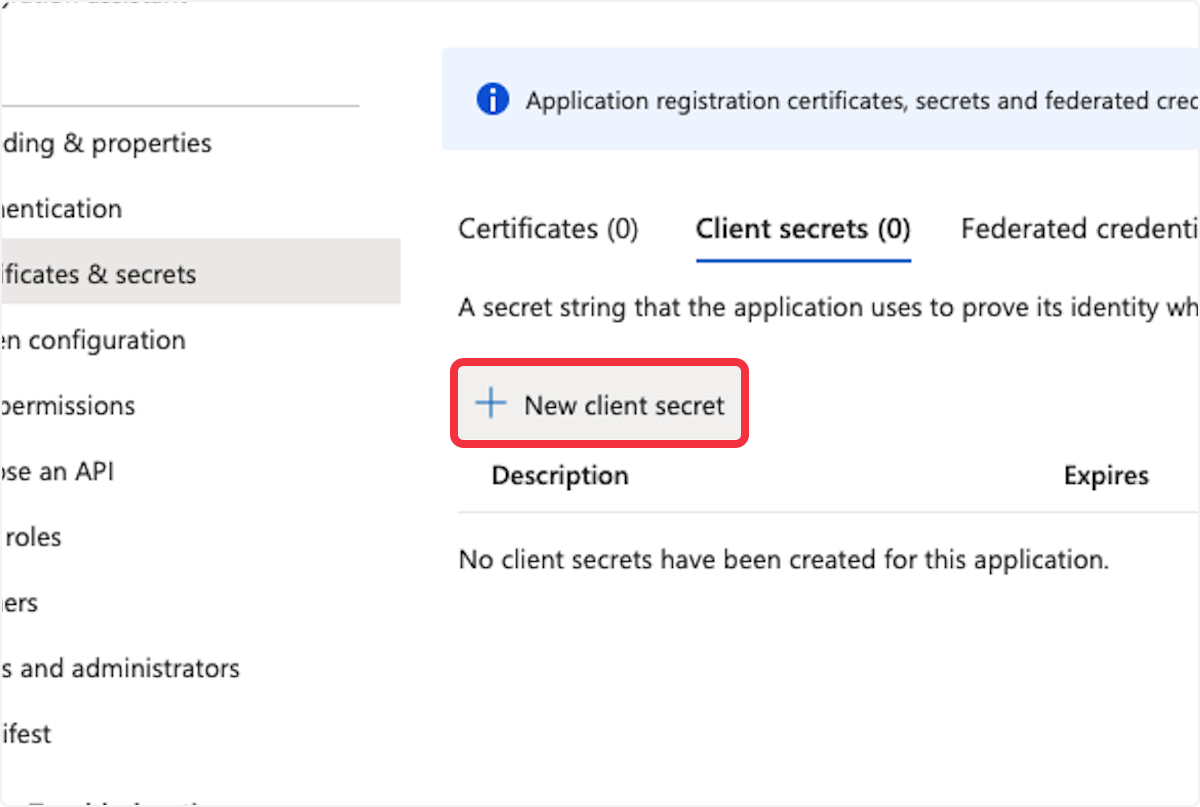
24. Click on New client secret
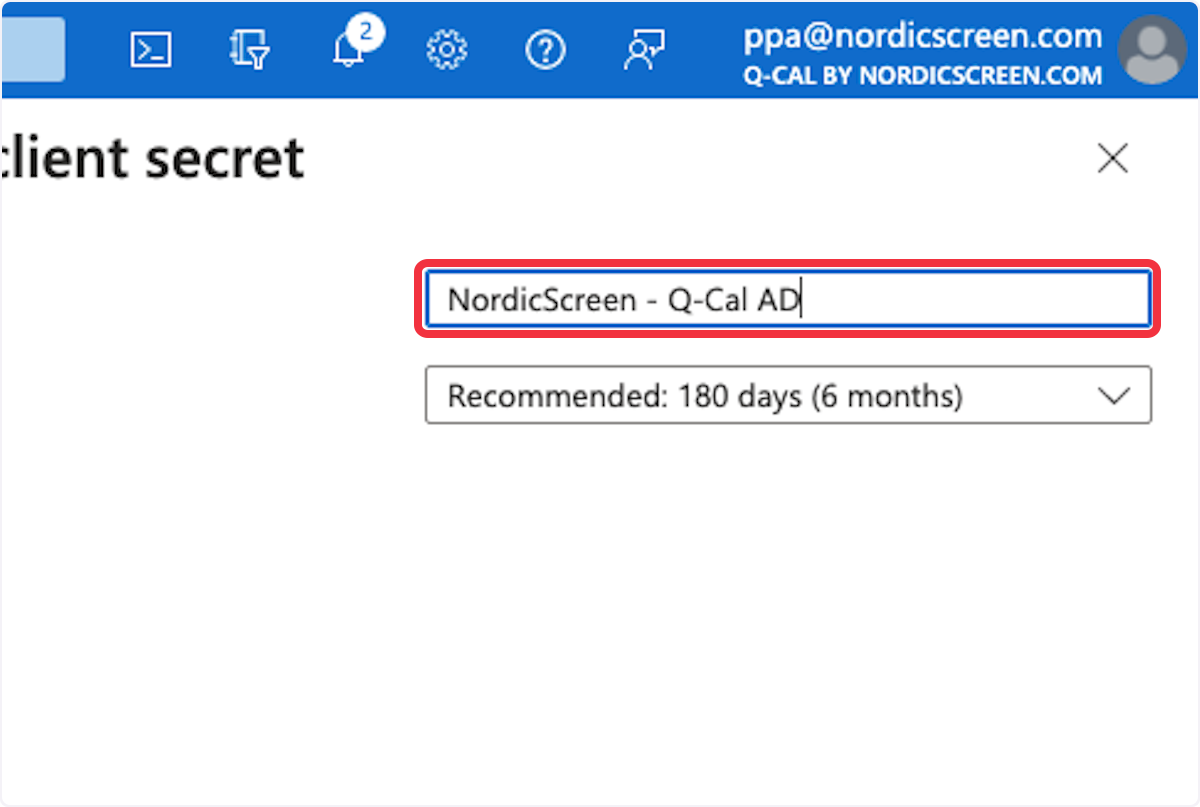
25. Type "NordicScreen - Q-Cal AD"
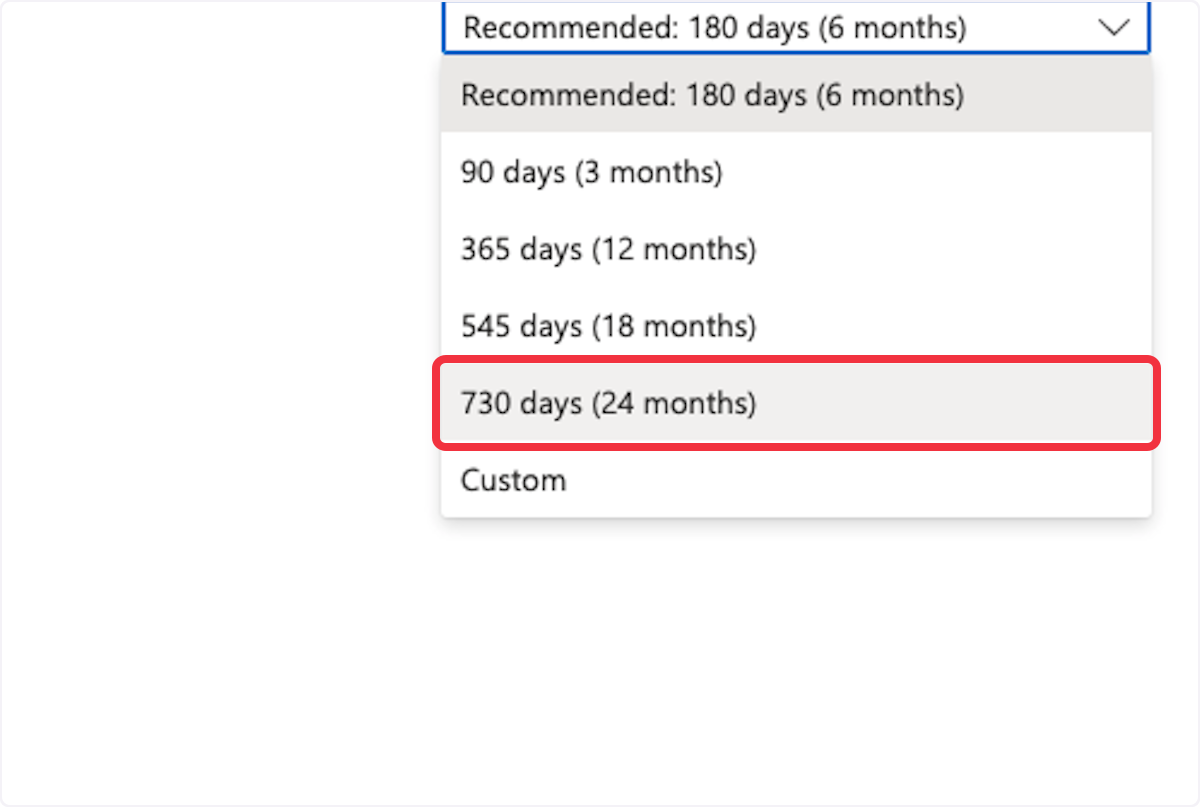
26. Click on Expires
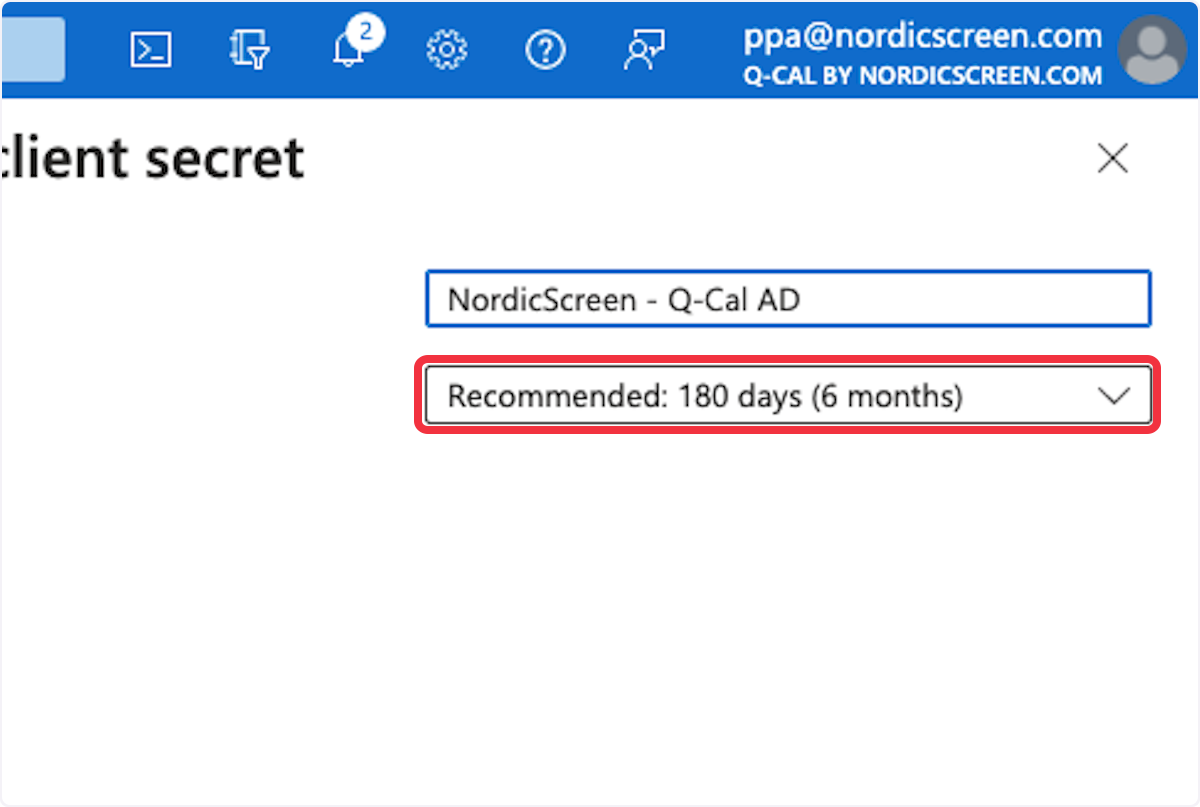
27. Click on 730 days (24 months)
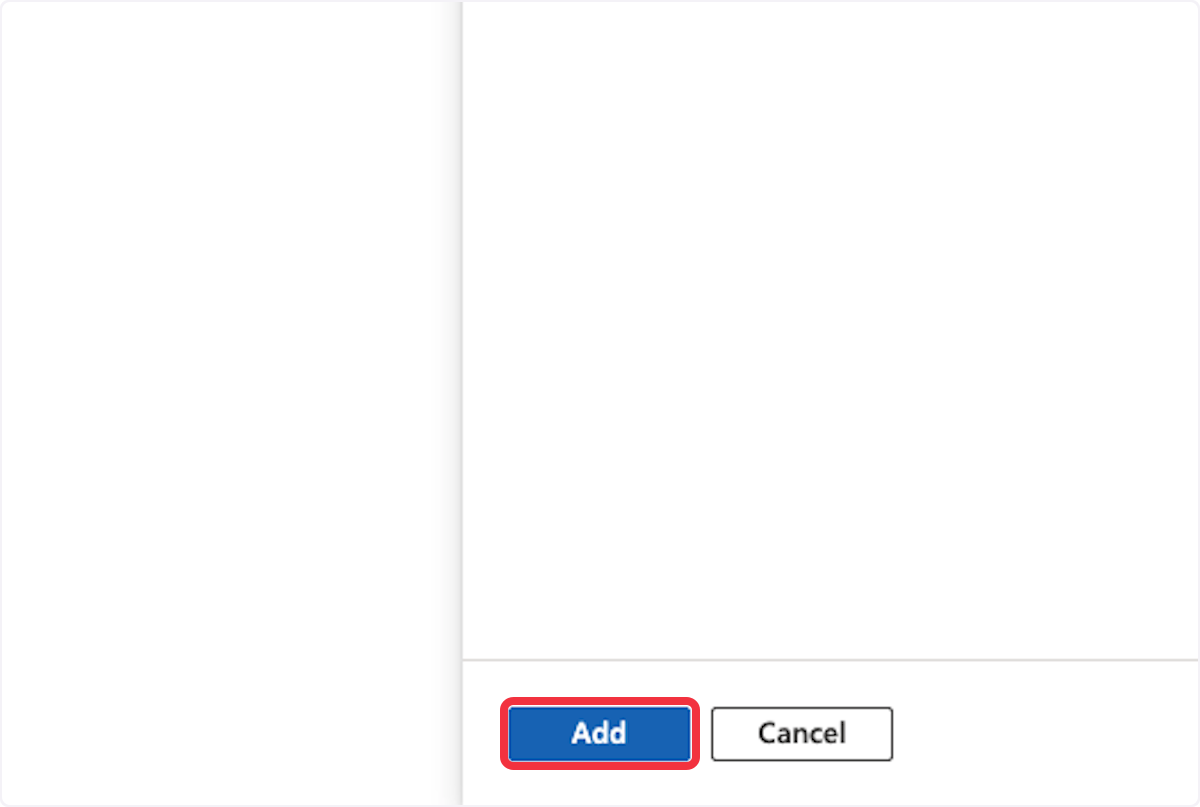
28. Click on Add
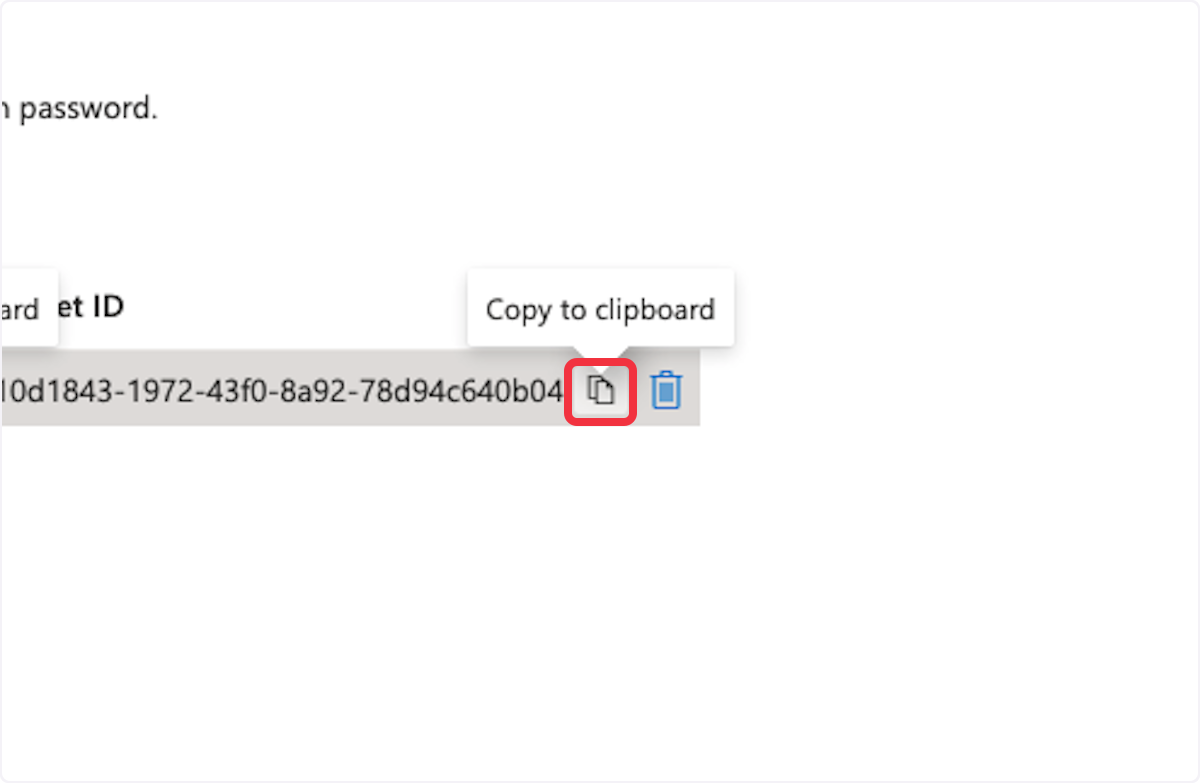
29. Click on Certificates & secrets

30. Copy "Value" and pas in a email (Used in part two of the guide)
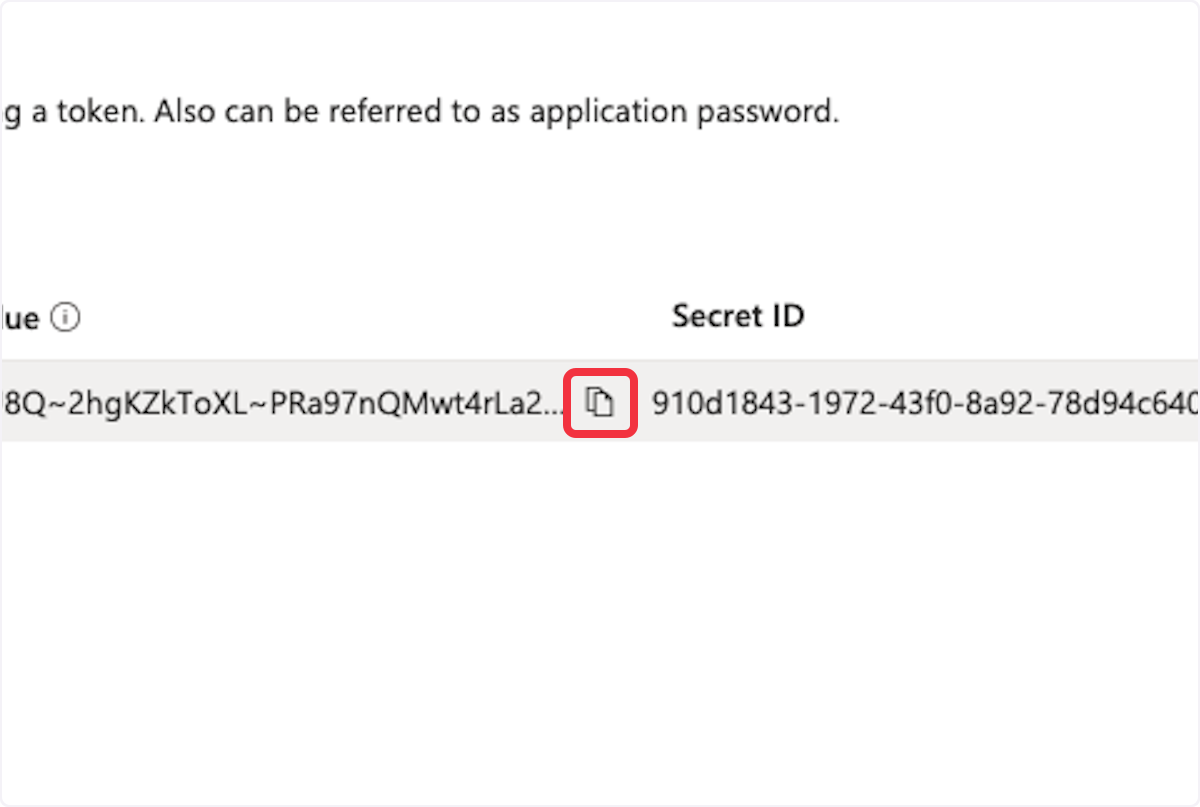
31. Copy "Secret" and pas in a email (Used in part to of the guide)
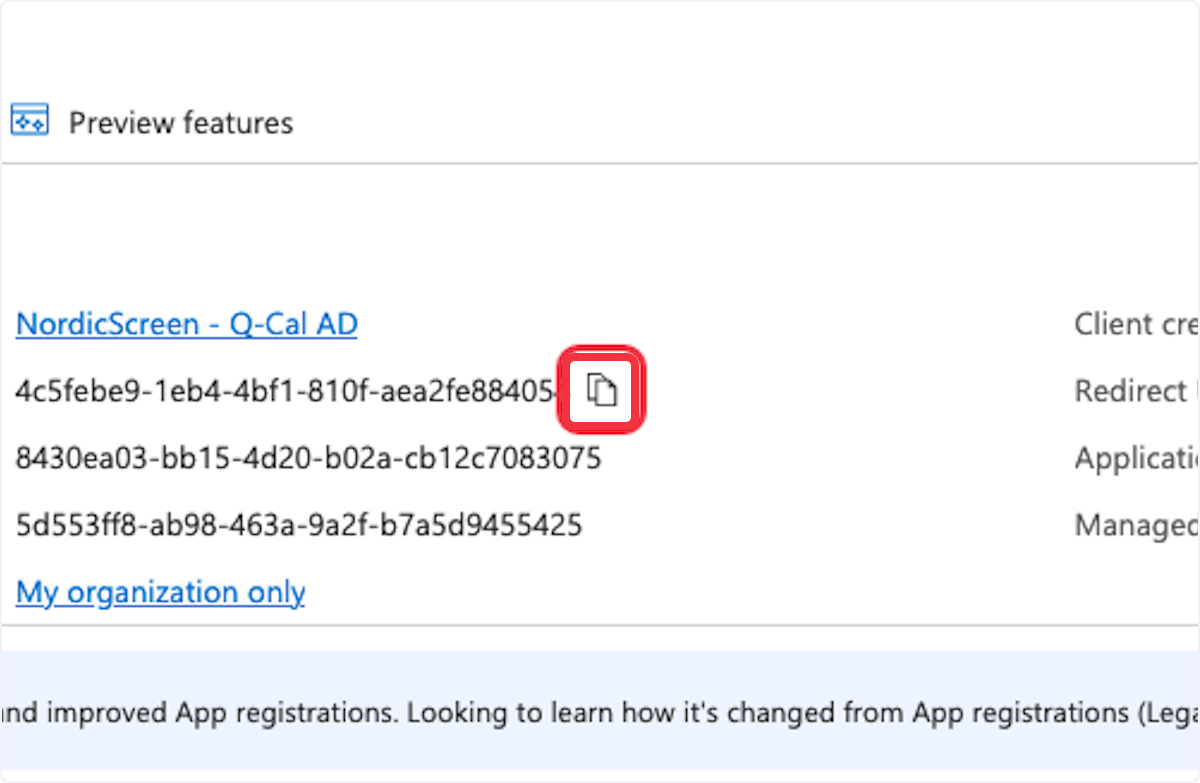
32. Click on Overview
33. Copy "Application (client) ID" and pas in a email (Used in part to of the guide)
Step 2: Configuring the Integration in Q-Cal
1.Go to Setup.
2. Click on Client Import.
3. Click on +.
4. Select Microsoft Azure AD.
5. Name the integration, e.g., Azure AD Integration.
6. Click on Azure Active Directory Configuration.
7. Enter the Application ID.
8. Enter the Application Key. Note: This should be the Value, not the secret key.
9. Enter your domain, e.g., nordicscreen.com.
10. Click on Save.
11. Activate the module by clicking on Enable Module.
12. Click on AD Groups.
13. Once the integration is correctly set up, all groups from Azure AD will appear. Select the groups Q-Cal should listen to and move them to Selected Groups.
14. Click on Save & Close.
Frequently Asked Questions (FAQ)
Why can’t I see the app in Azure Portal?
Ensure you have the necessary admin rights.
What do I do if no clients appear?
Click on Test Run, or wait as it may take several hours for Q-Cal and Azure to establish a connection.
How do I know if the integration is working?
If AD groups appear correctly under AD Groups, the integration is functional.
Related Articles
Integration Basics
Setting up integrations in Q-Cal: the basics This guide covers how to find, add, and configure any calendar integration in Q-Cal. The specific setup steps for each integration type (Tech Hotel, Microsoft Exchange, etc.) are covered in their own ...Create Employees as Clients for Check-In
To show an employee on the Check-In solution, the person must be created as a client in Q-Desk via app.q-cal.net. This guide describes how to create an employee on the "Har aftale" and "Har ikke aftale" list on the Check-In solution, respectively. If ...How to create a Check-In view with guest registration
This guide shows step by step how to create a Check-In design with guest registration for you solution. 1. The first step is to log in to Q-Cal. 2. Here, click on Design. 3. You can choose what you want to create a design for. Select Check-In. 4. ...How to create/use Q-Cal Templates for Q-Play Template solution
How to create a Q-Cal Screen Design. If you want to add a dynamic element to your Q-Play template, we can create a relevant template in Q-Cal. Then we also showcase how the two systems work together. Sign in to Q-Cal. Click on Design Choose a display ...Set up ChurchDesk Integration
This guide describes how to set up Churchdesk in Q-Cal. The guide is divided into 2 parts: 1. Contact Churchdesk for link delivery. 2. Set up the integration in Q-Cal. Contact Churchdesk for link delivery. To set up a Churchdesk integration in Q-Cal, ...