Group management of players
You can divide all your players into groups that you decide the name of eg (office in Randers). Follow this guide to learn how to create a group as well as move around your Players under the PlayControl page.
This guide shows the procedure when your view is set to "list form"
(This is selected in the upper right corner)
Create new group for your players
- Go to the PlayControl page in Q-Play.
- Click the NEW GROUP button in the upper left corner.
- Now enter the desired name of the group in the field Group name and press Create.
- You can now see your newly created group on the left.
Divide your players into groups
Method 1: Move one player at a time.
1. Simply just drag the player down to another group.
1. Simply just drag the player down to another group.
Method 2: Move more than one player at a time.
1. Click on the "Standard" group under Groups to find a new player.
2. Check the box next to the player name of the player you want to move.
3. Click on the "Move Player" icon in the upper right corner:
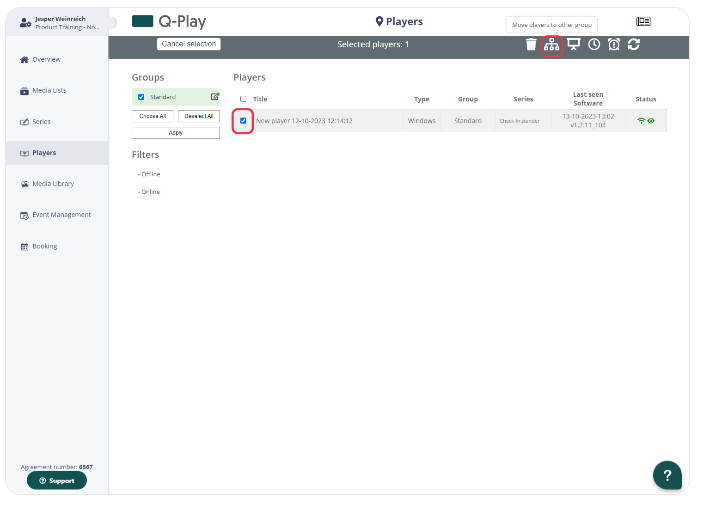
4. In the "Select group" field, select the group you want to move the player to and press "Move".
5. Click on the group you have moved your player to and tap the desired player to manage it.