How to only show "Public" meetings
If you only want to show "Public" meetings on your Q-Cal SignangeViews/Screen, follow this guide that shows how you set it up.
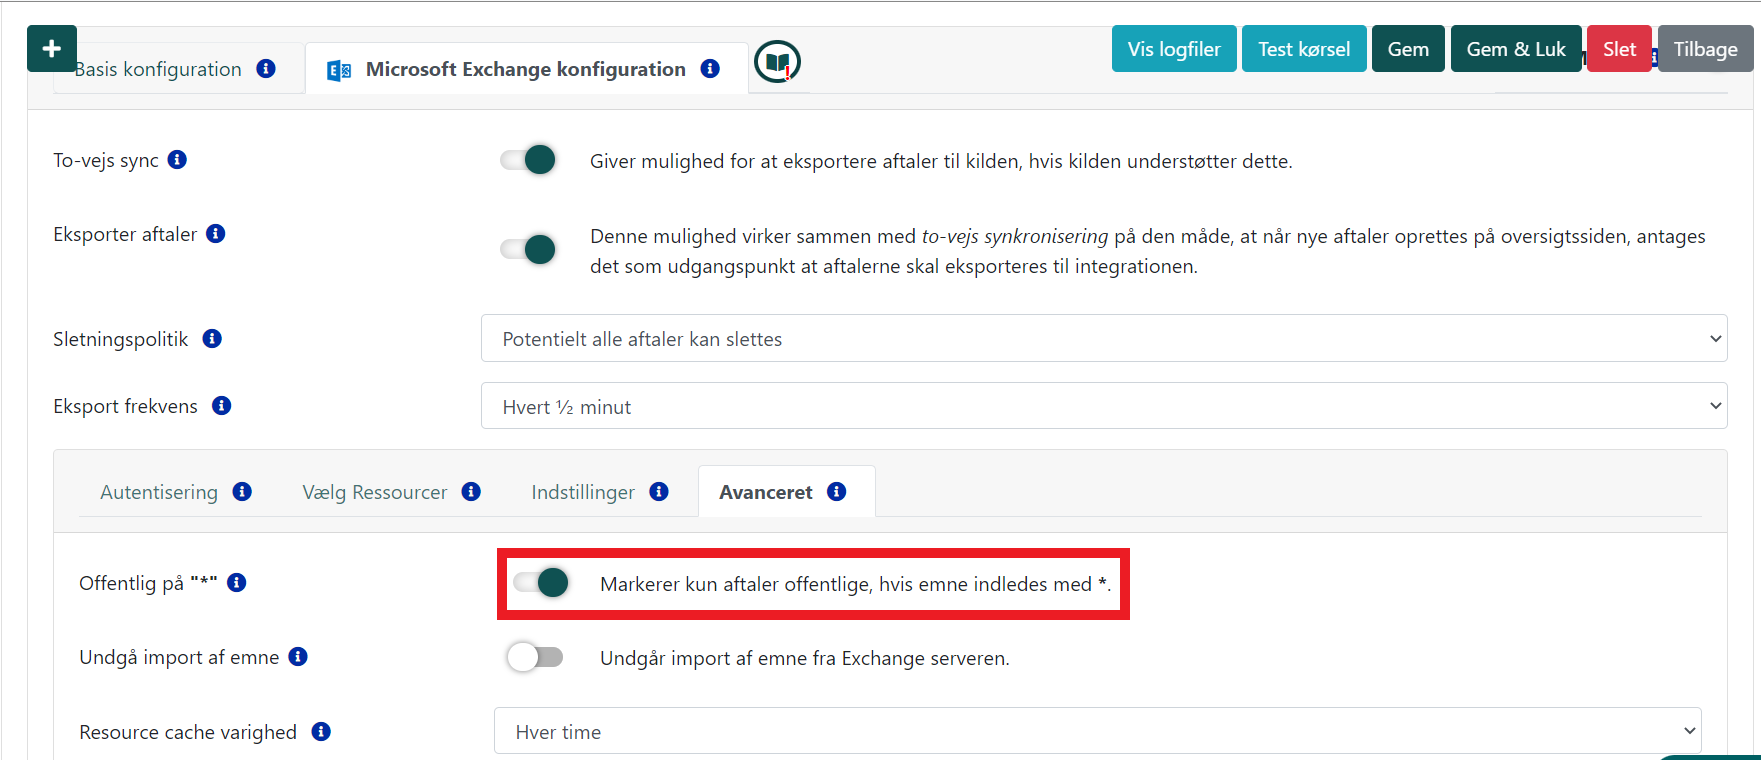
Part 1: Turn on "Mark meetings as public if subject starts with *".
1. Log in to Q-Cal in your browser, and click on Main menu.
2. Hereafter choose Calender Integrations.
3. Click on the small Gear icon next to the desired calender integration.
4. Choose the Advanced tab under the inegrated calenders configuration. Hereunder turn on Public on "*".
This mean that you need to put a "*" before the meeting subject, to have the meeting shown on a SignageView.
If there is no "*" before the meeting subject, the meeting will not be marked as public, and will not be shown on the SignageView
A example could be: You head your own calender and in the subject field, you write: "*Meeting with Mark". That would be a public meeting.
When done press Save & Close in the top right corner.

Part 2: Activate "Show only public meetings
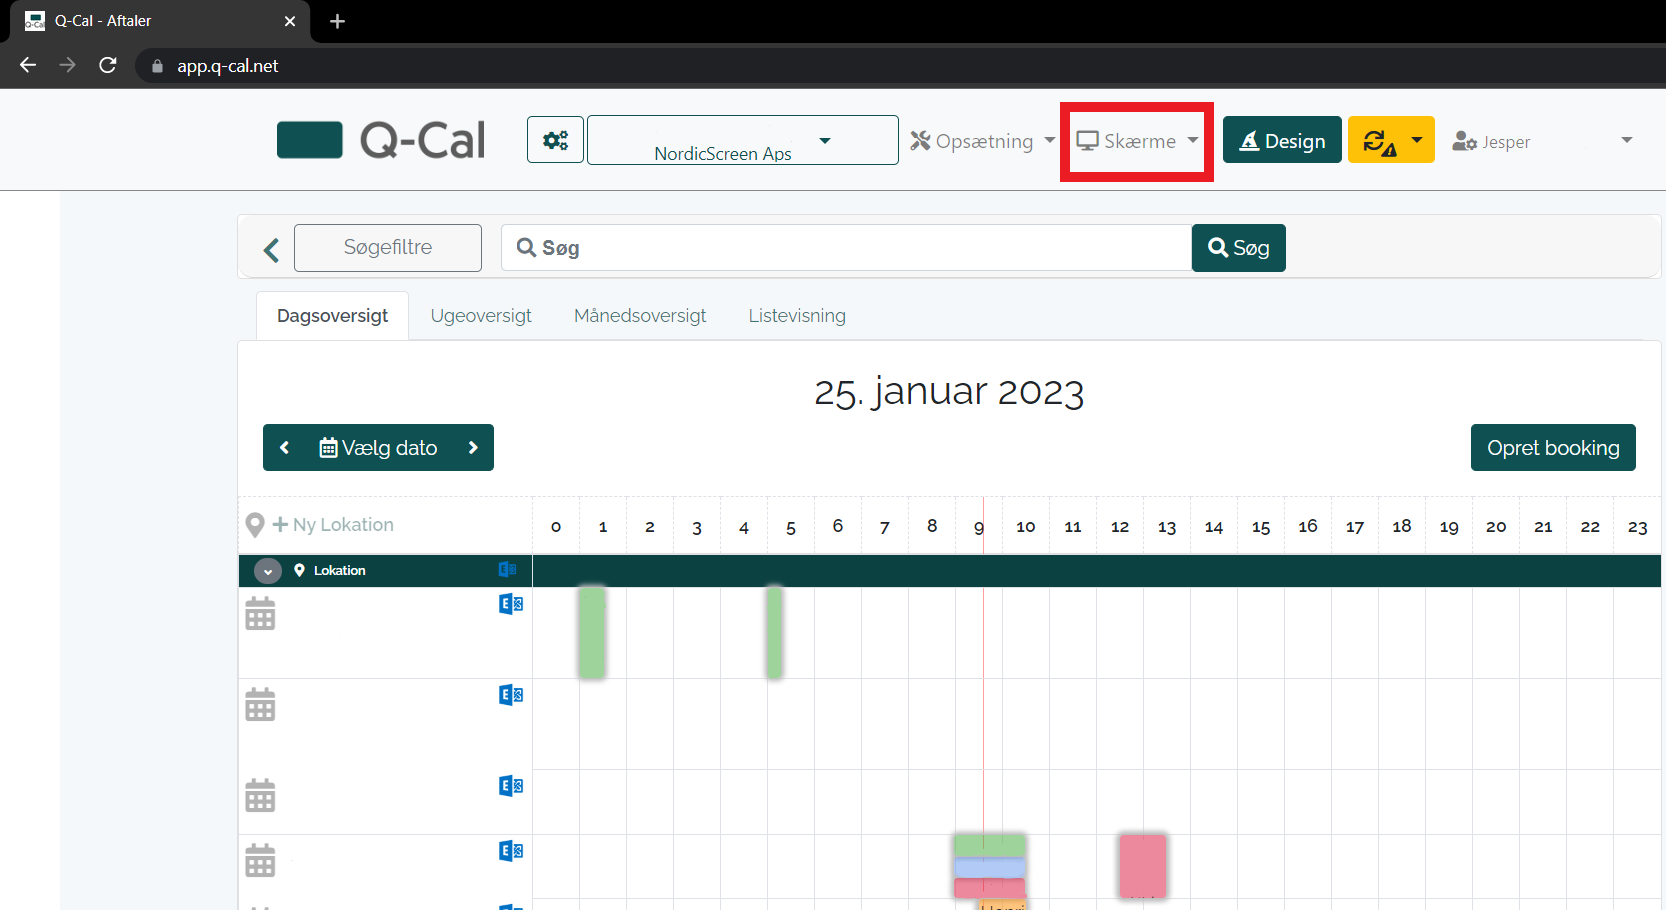
1. In the startmenu click on Screens.

2. After, select SignageViews.

3. Click on the Gear Icon next to the desired SignangeView.

4. Head to the buttom of the page, and click on Advanced Settings.
2. After, select SignageViews.
3. Click on the Gear Icon next to the desired SignangeView.
4. Head to the buttom of the page, and click on Advanced Settings.
5. Here turn on Show only Public. This means that the chosen SignageView will only show meetings marked at "Public"
When you're done, click on Save & Close in the top right corner.
Related Articles
How to make your meeting room display show green during meetings
This guide will show you how to make your meeting room display show green during meetings. 1. Log in to Q-Cal 2. Click on Views. 3. Hereafter choose Meeting Room Displays. 4. Click on the Gear-Icon next to the desired meeting room display. 5. Expand ...ICalendar Introduction
This guide show you which guide to read to get the correct integration configured. Select the desired ICal-based integration below: - Google ICalendar - Aula - ChurchDeskHow to enable meeting confirmations on meeting room displays
Introduction This guide will help you activate the meeting confirmation feature on your meeting room displays. This feature ensures that meetings are confirmed within a set time; otherwise, the room will be automatically released for other users. ...How to create/use Q-Cal Templates for Q-Play Template solution
How to create a Q-Cal Screen Design. If you want to add a dynamic element to your Q-Play template, we can create a relevant template in Q-Cal. Then we also showcase how the two systems work together. Sign in to Q-Cal. Click on Design Choose a display ...How to design a activity overview
Q-Cal is a smart screen solution with many options. But how do you create an activity overview? This guide will show you step by step how to make an activity overview. 1. Click on Design at the top of the site. 2. Choose Activity Overview. 3. Select ...