i3-Technologies - Installation
Introduktion
This installation guide is designed to help you correctly install and configure Q-Play on i3-Technologies screens. Q-Play is a powerful application that enables dynamic and engaging content delivery on your screens. Follow these steps to ensure a smooth setup and optimal user experience.
Note:
An i3-Technologies technician will set up the screen.
Before installation
Ensure the screen is connected to WIFI.
- Check that the firmware and other updates are up to date on the screen.
During installation
1. Open the menu: Press the "menu" button on one of the screen's sides to access the main menu. This can be located either on the right or left side of the screen, depending on the model and setup.
2. Navigate to the app tray: In the menu, find and press the icon with the "9 squares" under "app tray". This icon represents the app tray where all installed applications are available.
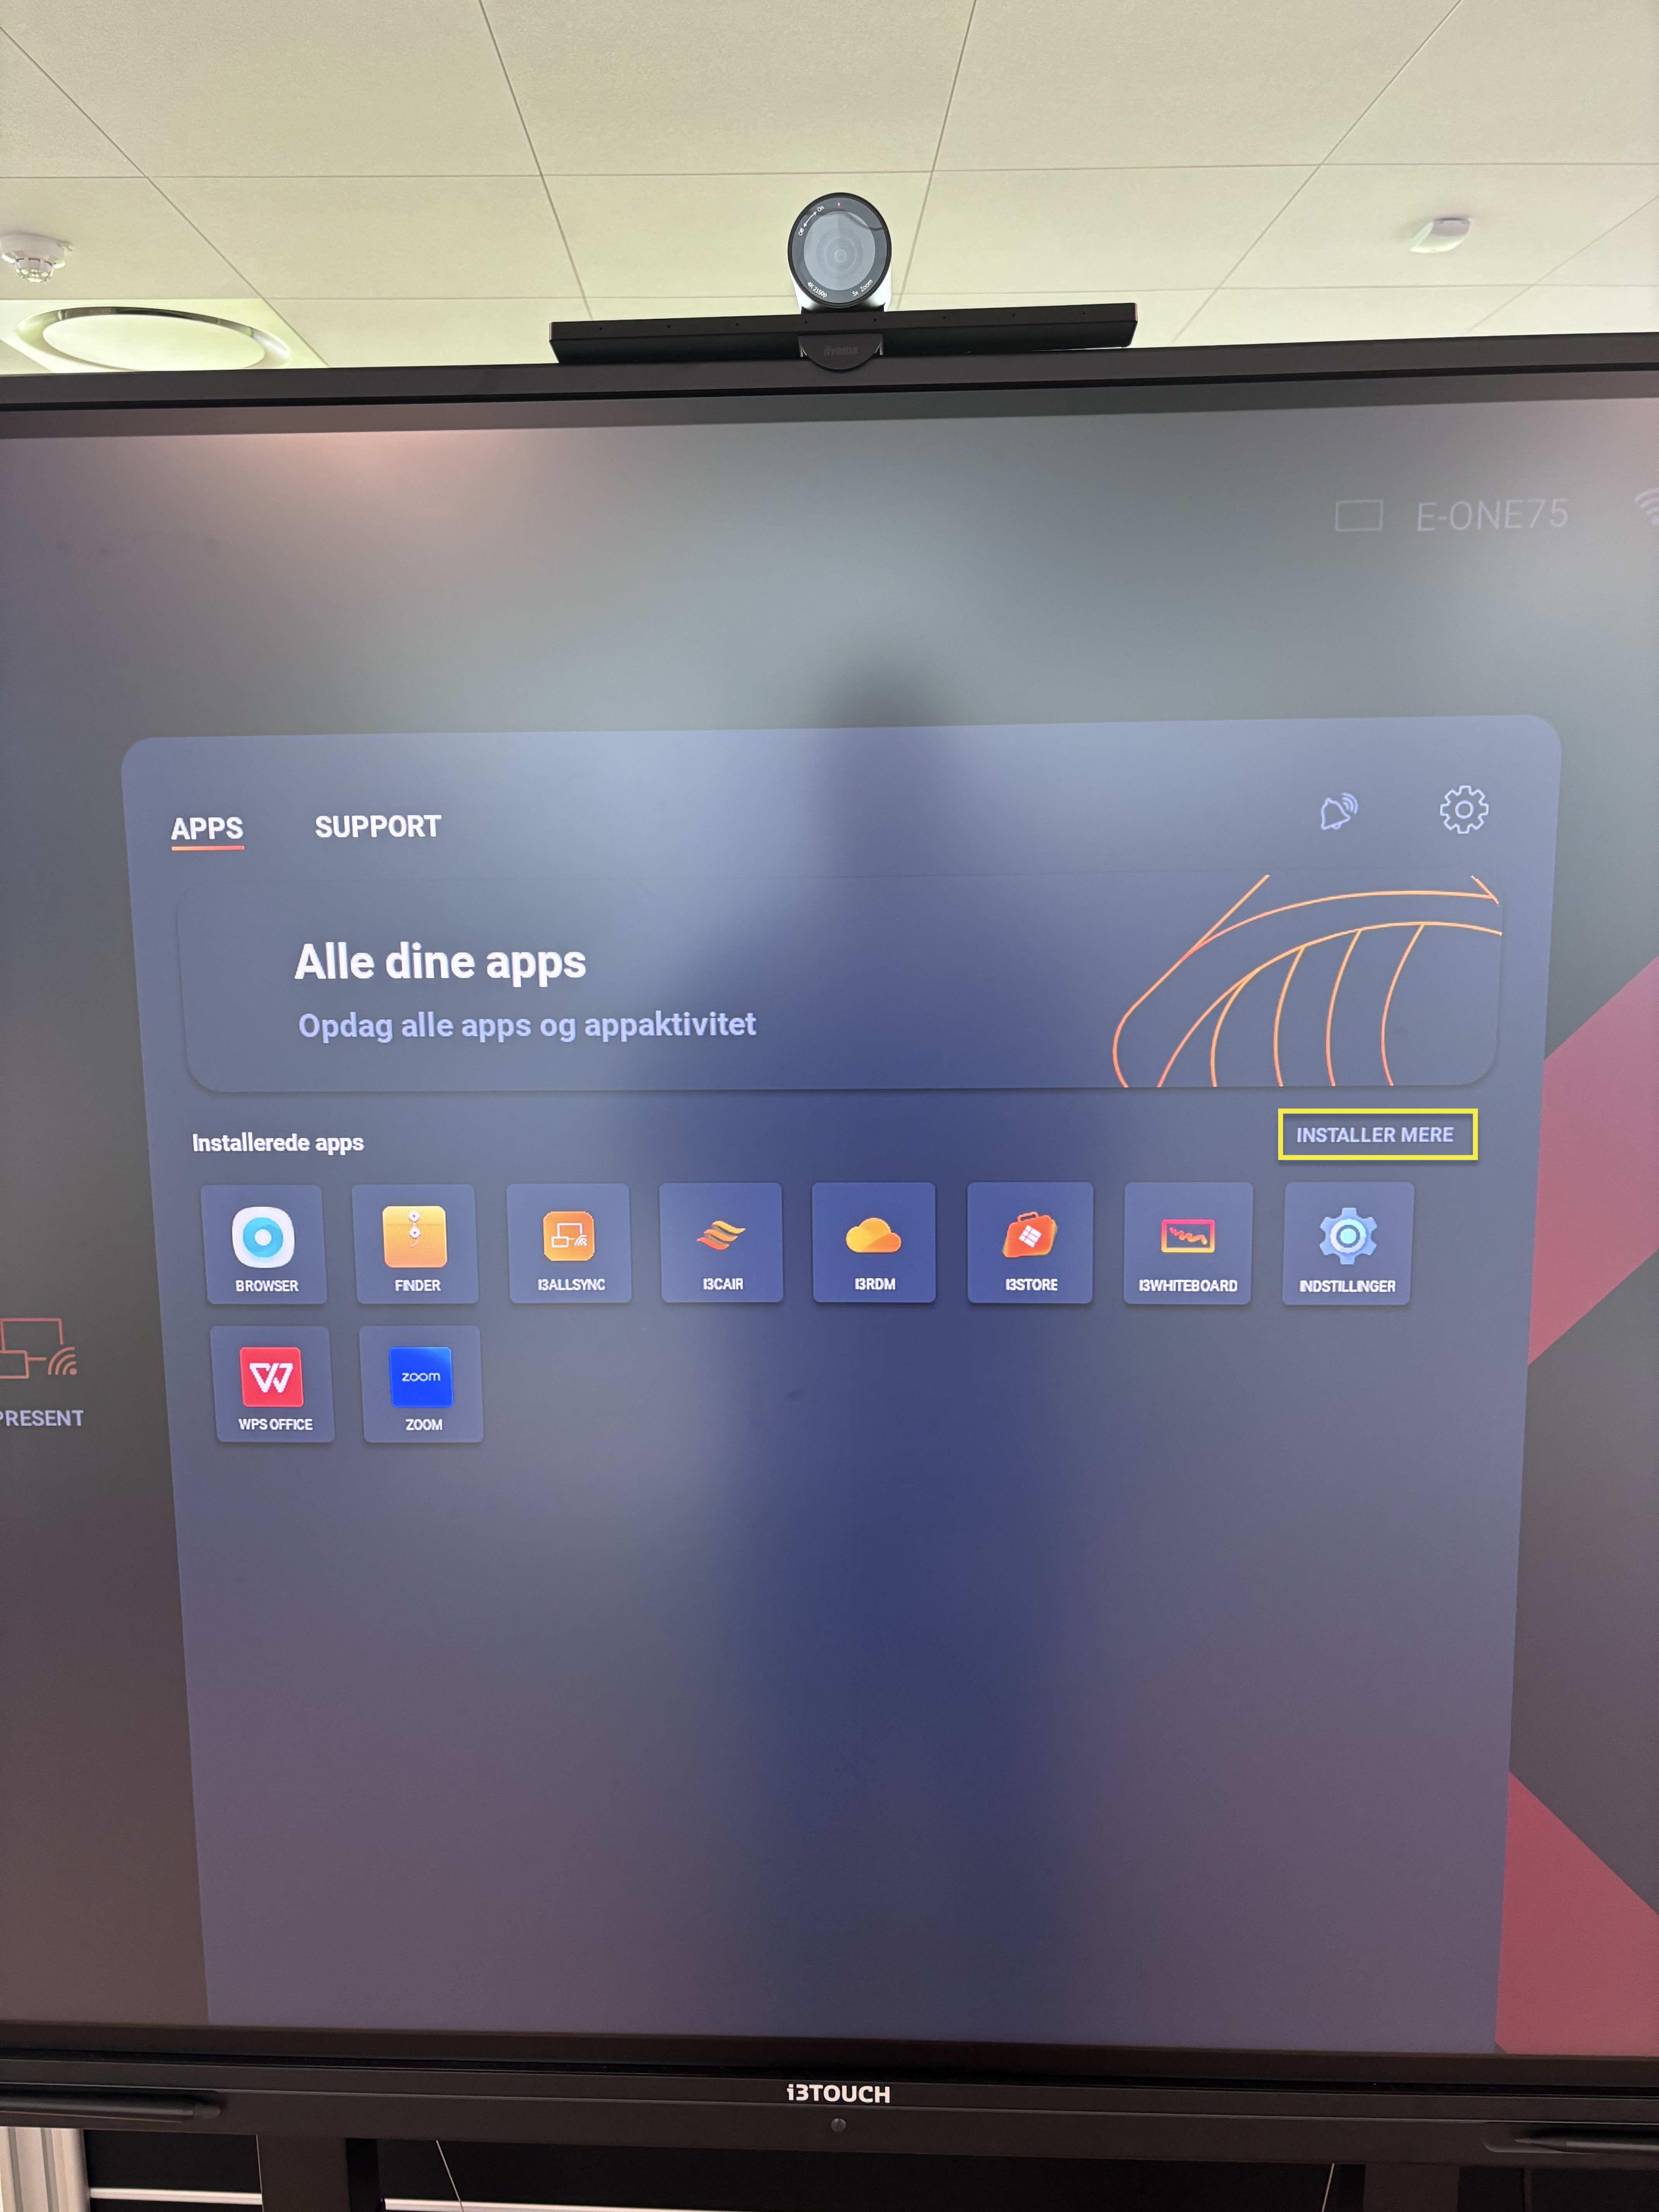
3. Install more: Press "Install more" to access more applications.
4. Find the Q-Play app: In the app tray, find and press the "Q-Play app". If the app is not immediately visible, you can scroll through the list or use the search function if available.
5. Install the app: Once you have found the Q-Play app, press "Install". Wait while the app is downloaded and installed on the screen.
6. Open Q-Play: When the installation is complete, press "Open" to start the Q-Play app.
7. Open settings: Once inside Q-Play, press the "menu" button on the side again to access additional settings.
8. Go to the gear icon: Press the "gear icon" to open the settings menu. Here you can adjust various settings for the Q-Play app and the screen.
9. Press "Android": Enter the Android settings to access advanced settings.
10. Startup and shutdown: Scroll down to the "startup and shutdown" section.
11. Schedule startup and shutdown: Press "Startup and shutdown schedule" and then "Add task". Here you can set when the screen should automatically turn on and off each day.
12. Set times: Set the desired times for startup and shutdown by selecting the times from the dropdown menus.
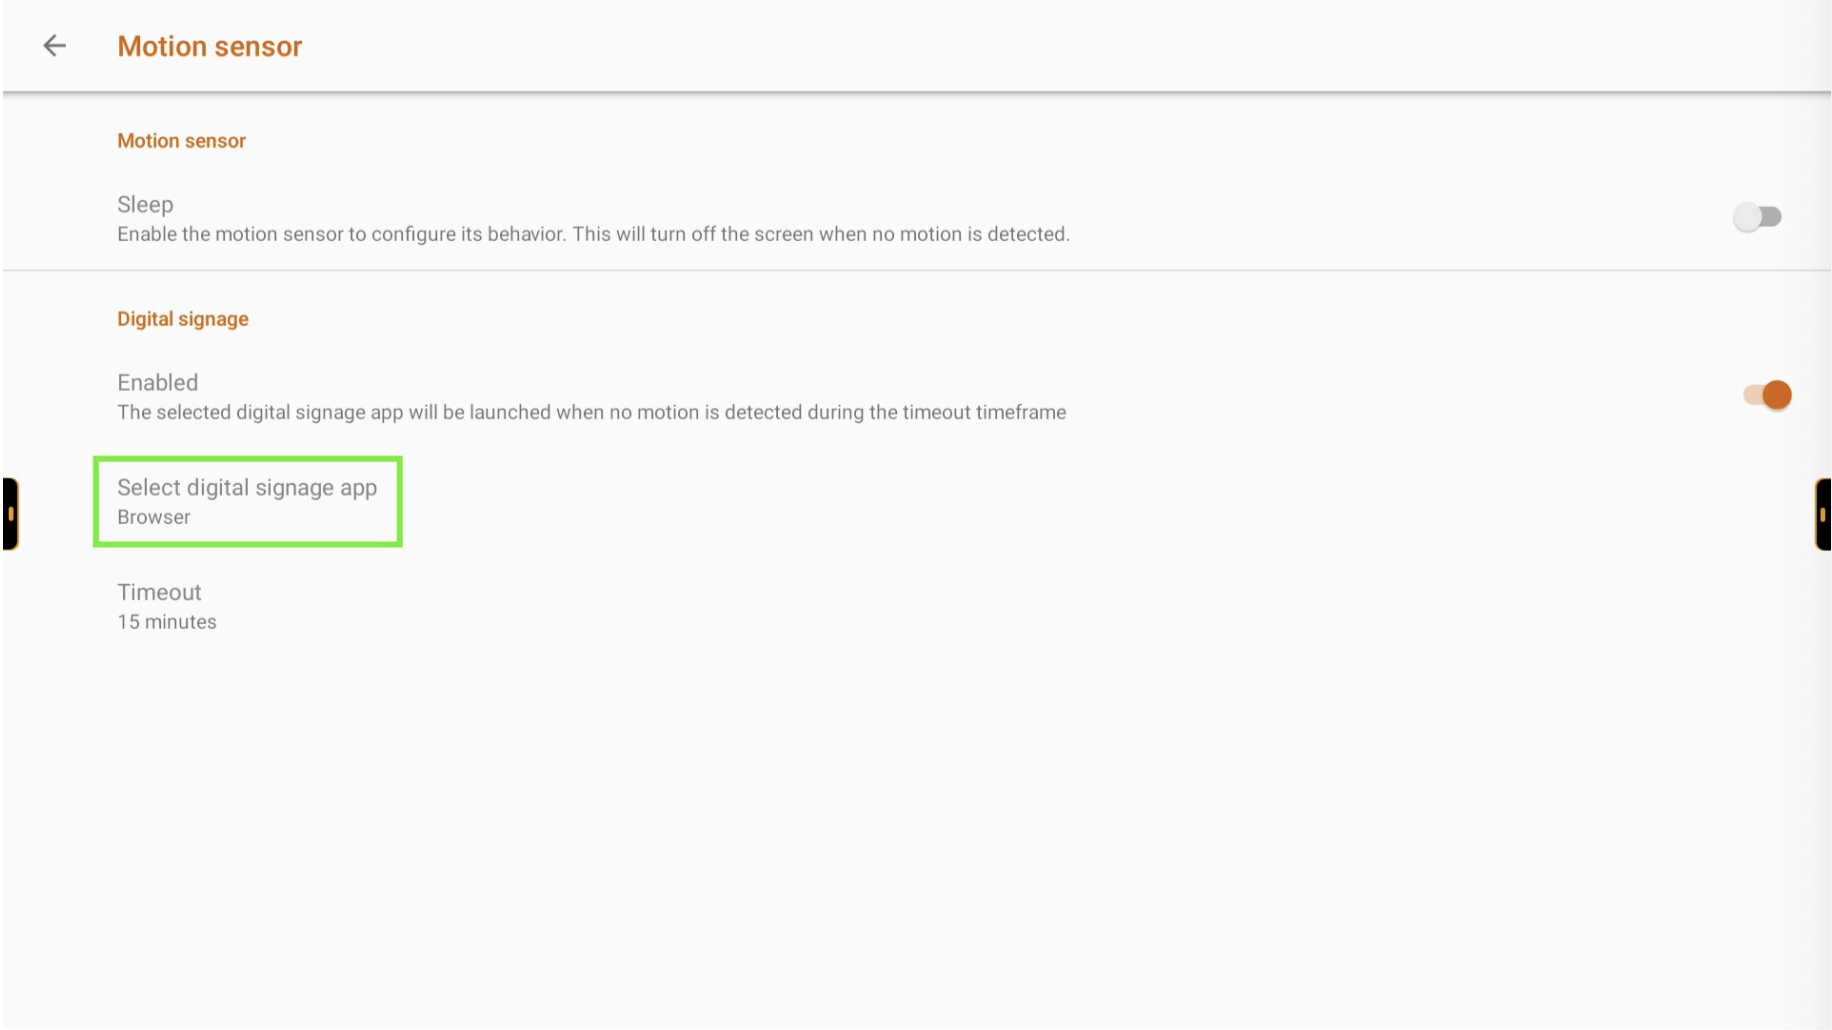
13. Motion sensor switch: Return to the main settings and press the "motion sensor switch".
14. Activate Digital Signage: In the motion sensor settings, enable "Digital Signage".
15. Select Digital Signage app: Press "Select digital signage app" and find "Q-Play" in the list of available apps. 
16. Select Q-Play to set it as the default signage app.
17. Disable Sleep: To ensure continuous playback, disable the "Sleep" function.
18. Add widgets: Return to the app tray by pressing the "9 squares" again.
19. Navigate to widgets: Press "widgets" to open the widget menu.
20. Add Q-Play widget: Press "Add" to add a new widget.
21. Configure widget: Enter the following information:
- Application: Q-Play player
- Label: Q-Play
After installation
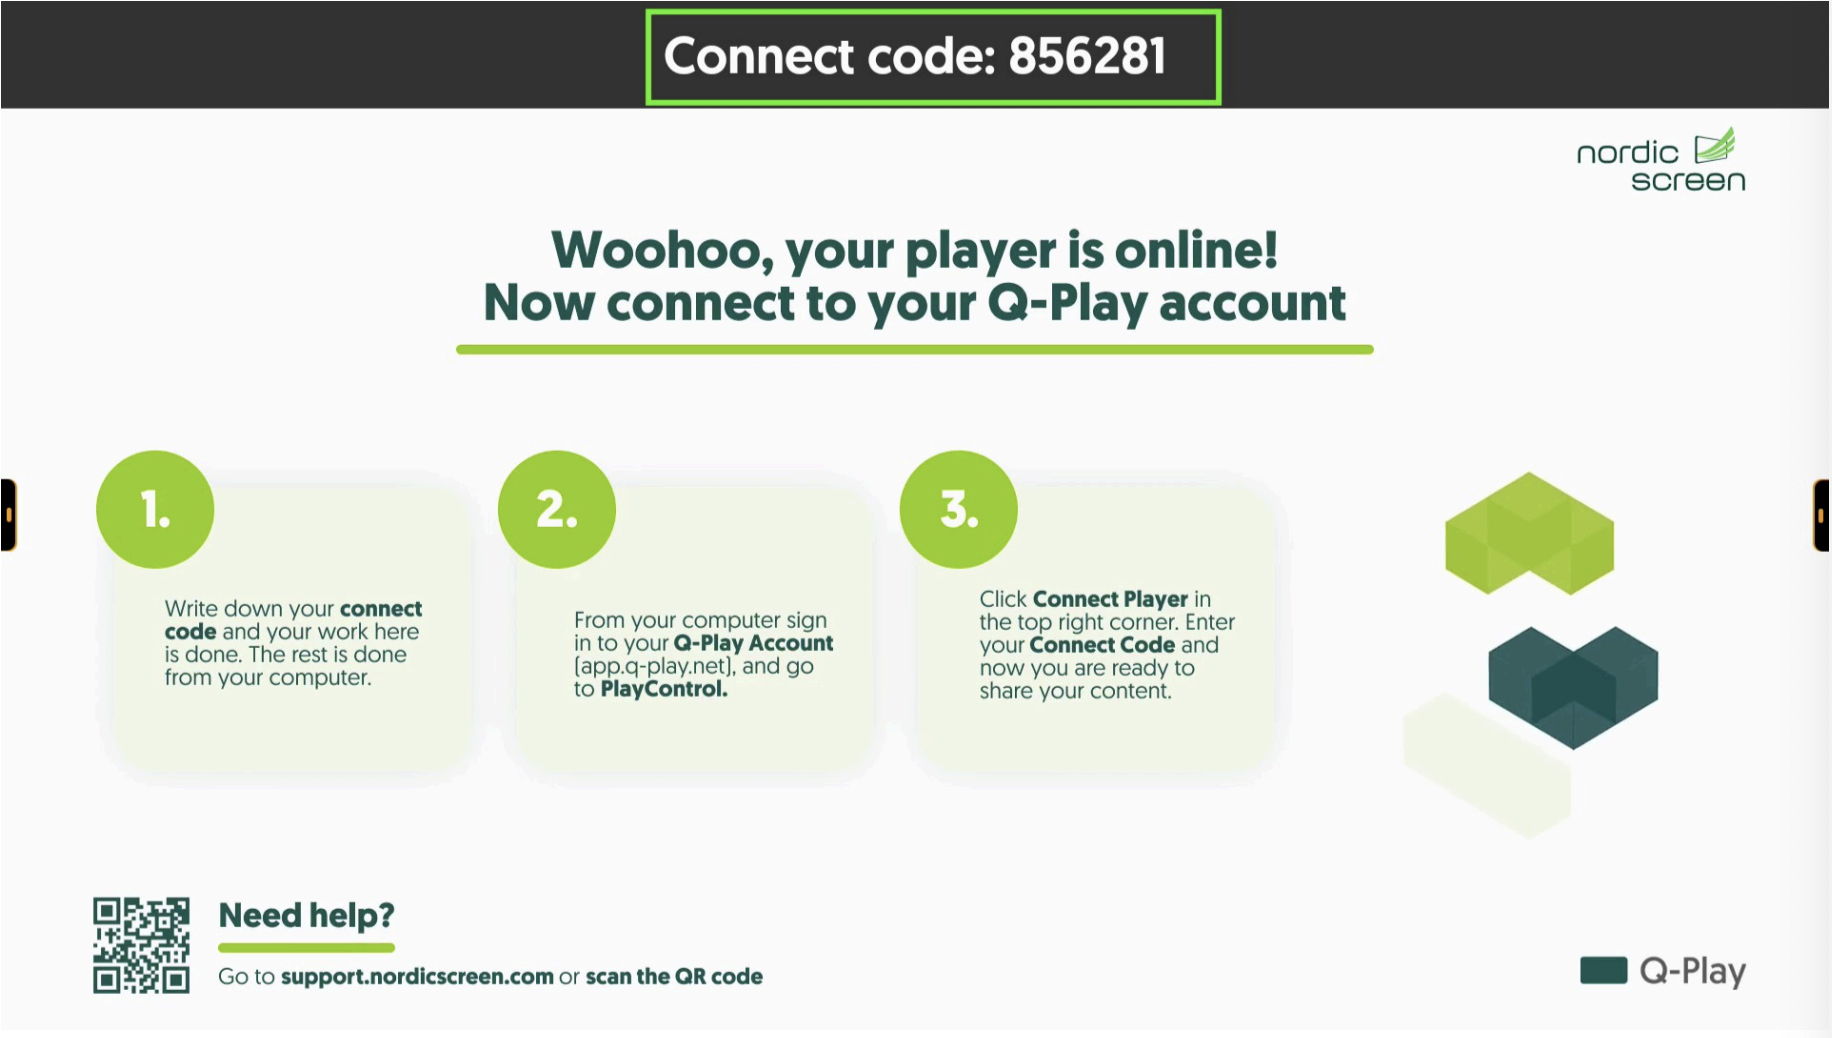
When the installation is complete and you see a "connect code" on the screen, you are ready to connect the player to your Q-Play account.
To add a design to the screen, follow these steps:
1. Log in to the Q-Play account where the device will be added.
2. Go to player.
3. Enter the 6-digit Connect Code from the screen into Q-Play.
If you are unsure how to connect in Q-Play, follow this guide
4. Add a design to the screen.
If you are unsure how to add a design in Q-Play, follow this guide.
See an additional guide to configure the screen to automatically start Q-Play after a certain number of minutes of inactivity. Read this guide to set up the screen to start Q-Play after a specified number of minutes of inactivity.
Related Articles
i3-Technologies - Automatic Startup
This guide describes how to set Q-Play to start after the device has been inactive for a certain amount of time. 1. Go to the Home Screen. 2. Head to Settings. 3. Click on Android. 4. Select Startup and shutdown. 5. Click on Movement Sensor Switch. ...Installation - Q-Play on Maxhub
Introduction Q-Play is a software program that allows you to display your info screen designs directly on your Maxhub screen. With Q-Play, you can create and manage exciting content that captures the attention of your guests or colleagues in a simple ...Installation Guide for QBic Meeting Room Display
Introduction The QBic meeting room display is an innovative solution to optimize meeting planning and management of meeting rooms. With an intuitive user interface, Q-Cal offers improved efficiency in any work environment. Bemærkninger: Read all ...Installation - Q-Play on Raspberry Pi
Introduction Welcome to the installation guide designed to help you install Q-Play on your Raspberry Pi. This guide combines necessary steps and recommendations to ensure a seamless setup and optimal performance from your Raspberry Pi, whether you're ...Installation - Q-Play on LG screen's
Introduction Q-Play is a software program that allows you to display your digital signage design directly on your LG screen. With Q-Play, you can create and manage exciting content that captures the attention of your guests or colleagues in a simple ...